Programming ESP32 with Arduino IDE: A Complete Guide
Category: Embedded Systems
Master Programming ESP32 with Arduino IDE Effortlessly
Are you a tech enthusiast, hobbyist, or embedded systems developer eager to unlock the full potential of your ESP32 module using the versatile Arduino IDE? You've landed in the right place. Whether you’re transitioning from basic microcontroller projects or stepping into embedded development with Python and C/C++, this guide is tailored to meet your needs without drowning you in jargon or fragmented info. Many developers find setting up ESP32 with Arduino IDE confusing due to intricate configuration steps and compatibility nuances. Perhaps you’ve struggled to configure board managers, flashed your microcontroller unsuccessfully, or wished for a clear pathway from installation to running your first sketch. This post cuts through the noise by providing a structured, step-by-step approach covering everything from environment setup, core libraries, programming essentials, to debugging tips—all designed to get your ESP32 project up and running quickly. Unlike other guides, we focus on practical insights backed by current best practices and detailed explanations, empowering you to harness ESP32’s features confidently. So, if you want to skip the trial-and-error phase and dive straight into creating with one of the most powerful microcontrollers around, read on and transform your projects today.
- Master Programming ESP32 with Arduino IDE Effortlessly
- Understanding the ESP32: Key Features and Advantages for Arduino Developers
- Installing Arduino IDE and Configuring ESP32 Board Manager
- Setting Up Your First ESP32 Project in Arduino IDE
- GPIO and Peripheral Programming Basics on ESP32 with Arduino IDE
- Wi-Fi and Bluetooth Programming with Arduino IDE
- Working with External Sensors and Actuators on ESP32 Using Arduino IDE
- Debugging ESP32 Code and Common Issues in Arduino IDE
- Optimizing Performance and Power Management on ESP32 with Arduino IDE
- OTA Updates and Advanced Features — Exploring Over-The-Air Programming for ESP32 using Arduino IDE
- Resources for Further Learning and Community Support
Understanding the ESP32: Key Features and Advantages for Arduino Developers
The ESP32 microcontroller stands out as a powerhouse in the realm of embedded systems, offering a remarkable blend of performance, connectivity, and versatility that surpasses many other popular development boards. For Arduino developers, the ESP32 unlocks exciting possibilities thanks to its robust hardware coupled with seamless integration into the familiar Arduino IDE environment. At its core, the ESP32 features a dual-core 32-bit Xtensa LX6 processor running at up to 240 MHz, delivering high-speed processing ideal for complex tasks, real-time control, and multitasking applications.
Key features that make ESP32 the preferred choice over many other microcontrollers include:
-
Integrated Wi-Fi and Bluetooth (BLE) Connectivity – Unlike traditional Arduino boards that require external modules for wireless communication, the ESP32 has built-in 2.4 GHz Wi-Fi and Bluetooth 5.0 capabilities, enabling easy development of IoT projects without added hardware complexity.
-
Rich Peripheral Interfaces – The ESP32 supports multiple interfaces such as SPI, I2C, UART, ADC, DAC, PWM, and capacitive touch sensors, providing extensive flexibility for connecting a wide variety of sensors and actuators, all programmable directly from the Arduino IDE.
-
Low Power Consumption Modes – For battery-powered or energy-sensitive projects, the ESP32 offers several low-power sleep modes that optimize energy use, a significant advantage over many legacy Arduino platforms.
-
Large Memory Availability – With substantial on-chip RAM and flash memory, the ESP32 can handle more complex applications and larger codebases, reducing the need for external memory components.
For Arduino developers familiar with the ease and simplicity of Arduino sketches, the ESP32 extends this simplicity while opening up advanced features typically available only through more complex development environments. Programming the ESP32 using the Arduino IDE preserves the beginner-friendly coding style and community support, while enabling the creation of powerful embedded systems, connected devices, and real-time applications—all in one versatile platform. This makes the ESP32 not just an upgrade but a smart choice for anyone looking to scale up from basic microcontroller projects to sophisticated IoT and embedded designs efficiently.

Image courtesy of Bmonster Lab
Installing Arduino IDE and Configuring ESP32 Board Manager
Before diving into programming your ESP32, the first critical step is to install the Arduino IDE and properly configure it to recognize the ESP32 board. This setup not only enables seamless uploading of sketches but also integrates the necessary core libraries essential for fully unlocking ESP32’s capabilities within the Arduino environment. Whether you’re starting fresh or already have Arduino IDE installed, following these step-by-step instructions ensures a smooth configuration process optimized for stability and future updates.
Step 1: Download and Install Arduino IDE
- Navigate to the official Arduino website at arduino.cc.
- Select the appropriate version of Arduino IDE for your operating system (Windows, macOS, or Linux).
- Download the installer or portable ZIP version as preferred.
- Run the installer and follow the on-screen instructions to complete the installation.
- Launch the Arduino IDE to confirm successful installation.
Note: It’s recommended to use the latest stable release of Arduino IDE (1.8.x or newer) for best compatibility with ESP32 board libraries and features.
Step 2: Add ESP32 Board Manager URL
The Arduino IDE uses a Board Manager system to add support for third-party hardware like ESP32. To enable this:
- Open Arduino IDE.
- Go to File > Preferences (on macOS, Arduino > Preferences).
- In the “Additional Boards Manager URLs” field, paste the following URL:
https://raw.githubusercontent.com/espressif/arduino-esp32/gh-pages/package_esp32_index.json
- If you already have other URLs there, separate them with commas.
- Click OK to save changes.
Step 3: Install ESP32 Board Core Libraries
- Open Arduino IDE.
- Navigate to Tools > Board > Boards Manager.
- In the search box, type ESP32.
- Select “esp32 by Espressif Systems” from the list.
- Click the Install button and wait for the installation to complete—this may take a few minutes depending on your internet speed.
Installing this package adds all necessary tools, including compilers, libraries, and configuration files tailored specifically for ESP32 programming.
By following these steps, your Arduino IDE becomes ESP32-ready, allowing you to select ESP32 development boards directly from the Arduino board menu and seamlessly compile and upload your code. This setup forms the foundation to harness powerful ESP32 features effortlessly using familiar Arduino workflows, making it a vital starting point for every ESP32-based project.
Image courtesy of Marc Mueller
Setting Up Your First ESP32 Project in Arduino IDE
Once you have your Arduino IDE configured for ESP32 development, the next crucial step is to create and run your first ESP32 sketch. This process verifies that your board is properly connected and that the environment is fully functional before you move on to more complex applications.
Creating a New Sketch and Selecting Your ESP32 Board
- Open the Arduino IDE and navigate to File > New to create a fresh sketch.
- Before writing any code, you need to specify the correct ESP32 board to ensure proper compilation and upload. Go to Tools > Board > ESP32 Arduino and select your exact ESP32 model. Common options include “ESP32 Dev Module”, “ESP32 Wrover Module”, or others depending on your hardware.
- Connect your ESP32 board to your computer via USB.
- Next, select the correct COM port by navigating to Tools > Port and choosing the port that represents your ESP32 device. On Windows, this appears as COMx; on macOS/Linux, it typically shows as
/dev/ttyUSBxor/dev/cu.SLAB_USBtoUART.
Ensuring the correct board and port are selected is fundamental to successful code uploads and communication between your PC and the ESP32.
Writing and Uploading the Blink Program
To confirm your setup is fully operational, it’s standard practice to use the familiar Blink example, which toggles the onboard LED on the ESP32.
Replace the default sketch code with this simple program:
// Blink example for ESP32 using Arduino IDE

const int LED_PIN = 2;  // ESP32 onboard LED pin

void setup() {
  pinMode(LED_PIN, OUTPUT);
}

void loop() {
  digitalWrite(LED_PIN, HIGH);   // Turn the LED on
  delay(500);                    // Wait for half a second
  digitalWrite(LED_PIN, LOW);    // Turn the LED off
  delay(500);                    // Wait for half a second
}
- Upload the sketch by clicking the Upload button (right-pointing arrow) in the Arduino IDE toolbar.
- Watch the IDE output; successful compilation and a “Done uploading” message indicate your ESP32 is ready.
- The onboard LED should now blink at half-second intervals, confirming the board’s responsiveness and your environment’s proper setup.
Troubleshooting Common Setup Issues
- If the IDE throws a “Failed to connect to ESP32” error, try holding down the BOOT button on your ESP32 board while initiating the upload.
- Ensure USB drivers for your ESP32 (e.g., Silicon Labs CP210x or FTDI) are properly installed.
- Double-check the selected port corresponds to your connected ESP32 device.
By completing these steps, you have successfully created and uploaded your first ESP32 project using the Arduino IDE. This foundational exercise not only confirms your hardware and software setup but also opens the door for exploring the ESP32’s vast capabilities through Arduino’s straightforward programming environment.
Image courtesy of cottonbro studio
GPIO and Peripheral Programming Basics on ESP32 with Arduino IDE
Mastering the GPIO (General Purpose Input/Output) pins and peripheral interfaces is fundamental to unlocking the full power of the ESP32 when programming with Arduino IDE. The ESP32 offers an impressively flexible set of I/O pins, supporting digital input/output, analog sensing, PWM (Pulse Width Modulation), and multiple peripheral configurations that enable complex embedded applications with ease.
Understanding ESP32 GPIO Pins
The ESP32 features numerous GPIO pins—typically around 34, depending on the module—that can be configured as input or output. Each GPIO pin can be programmed using Arduino’s familiar functions such as pinMode(), digitalRead(), and digitalWrite(). However, unlike many Arduino boards, some GPIOs on the ESP32 have specific characteristics or restrictions you should be aware of, such as input-only pins or pins used for boot mode selection. It’s essential to consult the ESP32 datasheet or pinout diagram when designing your circuits.
Key points about ESP32 GPIO:
- Supports input, output, pull-up and pull-down resistors configuration.
- Some pins support interrupt handling for responsive event-driven programming.
- Many GPIOs are multi-functional, doubling as interfaces for peripherals like SPI, UART, and I2C.
PWM on ESP32: Controlling Analog-like Outputs
PWM is critical for applications such as controlling LED brightness, motor speed, or audio signals. The ESP32’s PWM is implemented via LED Control hardware, offering up to 16 independent channels across its GPIOs, with adjustable frequency and resolution (up to 16 bits). Using the Arduino IDE, PWM control can be managed with functions like ledcSetup(), ledcAttachPin(), and ledcWrite(), offering far greater flexibility compared to the traditional Arduino analogWrite().
Basic steps for PWM on ESP32 include:
- Initialize a PWM channel with desired frequency and resolution.
- Attach GPIO pin to the PWM channel.
- Write duty cycle values to control output intensity.
Reading Analog Signals with ADC
The ESP32 contains multiple analog-to-digital converter channels, allowing you to read sensor data such as temperature, light, or potentiometer values using analogRead(). Unlike traditional Arduino boards, the ESP32 ADC supports up to 12-bit resolution, delivering finer measurement granularity. Remember that the ESP32 analog inputs have specific voltage ranges and may require calibration for accurate readings.
Configuring Peripherals Using Arduino Libraries
One of the ESP32’s standout features is its integrated support for widely used communication protocols and peripherals, all accessible through easy-to-use Arduino libraries:
- I2C (Wire Library): Connect sensors and displays using the two-wire interface.
- SPI: High-speed serial communication for memory cards, displays, and more.
- UART: Serial communication for debugging or external modules.
- DAC: Direct analog output for audio or analog signal generation.
By leveraging these Arduino libraries, setting up peripherals becomes straightforward, enabling rapid prototyping of connected devices and embedded systems. Proper initialization and configuration of these peripherals often involve specifying pins, bus speeds, and device addresses, but once set up, the ESP32 offers robust, stable performance for your applications.
By gaining comfort with ESP32’s GPIO and peripheral programming basics, you lay the groundwork to innovate with sophisticated sensors, actuators, and IoT devices—all within the familiar and developer-friendly Arduino IDE. Whether blinking LEDs with PWM, reading analog sensor data, or communicating via I2C and SPI, these core skills are indispensable for any ESP32-powered project.

Image courtesy of cottonbro studio
Wi-Fi and Bluetooth Programming with Arduino IDE
One of the most compelling reasons to choose the ESP32 for your embedded projects is its built-in Wi-Fi and Bluetooth capabilities—both of which are fully supported within the Arduino IDE environment. Leveraging these wireless features enables you to build cutting-edge IoT devices, remote sensors, and connected applications without needing additional modules or complex configurations.
Enabling Wi-Fi on ESP32 with Arduino IDE
The ESP32’s Wi-Fi functionality allows your device to connect to local networks, enabling data exchange with servers, smartphones, or other devices. Arduino’s WiFi.h library simplifies Wi-Fi management, letting you easily create clients, access points, or even configure the ESP32 as a web server.
Here are the essentials to get started:
-
Include the library:
cpp #include <WiFi.h> -
Connect to a Wi-Fi network:
UseWiFi.begin(ssid, password)to initiate connection. -
Check connection status:
Loop withWiFi.status() == WL_CONNECTEDto verify success. -
Obtain IP address:
Once connected, useWiFi.localIP()to retrieve your device’s IP.
Example snippet to connect your ESP32 to Wi-Fi:
#include <WiFi.h>

const char* ssid = "YourNetworkName";
const char* password = "YourPassword";

void setup() {
  Serial.begin(115200);
  WiFi.begin(ssid, password);

  Serial.print("Connecting to Wi-Fi");
  while (WiFi.status() != WL_CONNECTED) {
    delay(500);
    Serial.print(".");
  }
  Serial.println("\nWi-Fi connected.");
  Serial.print("IP address: ");
  Serial.println(WiFi.localIP());
}

void loop() {
  // Your application code here
}
This straightforward process integrates robust Wi-Fi capabilities into your projects, enabling communication with cloud services, web APIs, or other networked devices effortlessly.
Utilizing Bluetooth (Classic and BLE) in Arduino IDE
The ESP32 supports both Bluetooth Classic and Bluetooth Low Energy (BLE), which broadens your options for wireless device communication and sensor interfacing. Arduino IDE provides dedicated libraries to harness these features with minimal overhead.
Key points for Bluetooth programming on ESP32:
-
Bluetooth Classic: Used for applications requiring continuous data streaming such as audio or serial data transfer, implemented via the
BluetoothSeriallibrary. -
Bluetooth Low Energy (BLE): Ideal for low-power, intermittent connections with sensors, mobile apps, or beacon devices, managed through the
BLEDeviceand related BLE Arduino libraries.
Basic steps to enable Bluetooth Classic:
-
Include the
BluetoothSerial.hlibrary. -
Initialize Bluetooth with a device name.
-
Use
SerialBTobject to send and receive data.
Example:
#include "BluetoothSerial.h"

BluetoothSerial SerialBT;

void setup() {
  Serial.begin(115200);
  SerialBT.begin("ESP32_BT_Device"); // Start Bluetooth with device name
  Serial.println("Bluetooth device started. Pair and connect.");
}

void loop() {
  if (SerialBT.available()) {
    char incomingChar = SerialBT.read();
    Serial.print("Received via BT: ");
    Serial.println(incomingChar);
  }
  if (Serial.available()) {
    SerialBT.write(Serial.read());
  }
}
For BLE, the setup involves defining services, characteristics, and callbacks using libraries like BLEDevice.h. Although slightly more intricate, BLE allows for highly efficient, modular wireless applications essential for modern embedded systems.
By mastering Wi-Fi and Bluetooth programming in Arduino IDE, you unlock the true potential of the ESP32 as a wireless embedded platform. This not only accelerates your development workflow but also empowers you to create connected solutions—from smart home automation, remote monitoring, to mobile app integration—all with concise Arduino sketches and reliable core libraries optimized for the ESP32 architecture.

Image courtesy of Bmonster Lab
Working with External Sensors and Actuators on ESP32 Using Arduino IDE
Integrating external sensors and actuators is where your ESP32 projects truly come to life, transforming raw processing power and connectivity into meaningful, interactive embedded solutions. The ESP32’s rich set of GPIOs, analog inputs, and communication interfaces like I2C, SPI, and UART makes connecting popular sensors—such as temperature, humidity, motion detectors—and controlling actuators—like motors, relays, and servos—both straightforward and powerful within the Arduino IDE ecosystem.
Connecting and Reading Data from Popular Sensors
Using Arduino’s well-supported libraries, you can effortlessly interface with widely used sensors to acquire essential environmental or positional data. Common examples include:
- DHT11/DHT22 (Temperature and Humidity Sensors): Utilize libraries like
DHT.hto read temperature and relative humidity values with simple functions likereadTemperature()andreadHumidity(). - BMP280/BME280 (Pressure, Temperature, Humidity Sensors): Leverage the
Adafruit_BMP280orAdafruit_BME280libraries for precise atmospheric data via I2C or SPI. - Ultrasonic Sensors (HC-SR04): Measure distance by triggering and timing echo pulses using basic digital I/O pins.
- Light Sensors (TSL2561, BH1750): Read ambient light intensity through dedicated sensor libraries over I2C.
To interface these sensors:
- Connect sensor data pins to appropriate ESP32 GPIOs. Use I2C buses for sensors supporting that protocol to reduce wiring complexity.
- Install corresponding Arduino libraries via Library Manager or GitHub.
- Initialize sensor objects in your sketch setup.
- Read sensor values periodically or upon interrupts in the main loop.
This structured approach allows you to collect real-time sensor data with minimal code, making your ESP32 projects responsive to physical conditions and user interactions.
Controlling Actuators for Responsive Project Outputs
Whether you’re lighting LEDs, driving motors, or activating relays, the ESP32’s flexible output pins and peripheral support give you fine-grained control over actuators. Common actuator components include:
- Servos: Controlled via PWM signals using the
Servo.hlibrary for precise positional control. - DC Motors and Stepper Motors: Driven using motor driver modules and PWM control for speed and direction.
- Relays and Solenoids: Switched through GPIO pins with proper isolation to control high-power devices safely.
- RGB LEDs and LED Strips (WS2812, NeoPixel): Managed through dedicated libraries like
Adafruit_NeoPixelfor dynamic lighting effects.
Key tips for actuator control:
- Always verify power requirements and use appropriate transistors or driver boards to avoid damaging the ESP32.
- Leverage ESP32’s hardware PWM channels for smooth motor speed regulation.
- Incorporate safety checks and state feedback when designing actuator interactions to prevent unintended behavior in your application.
Combining sensor input with actuator output allows you to develop dynamic, interactive systems that respond intelligently to environment or user commands—from automated home systems and robotics to IoT-enabled monitoring solutions.
By mastering sensor integration and actuator control on the ESP32 with the Arduino IDE, you unlock a vast universe of creative possibilities. The ability to read varied real-world data precisely and control devices reliably is the cornerstone of impactful embedded systems, making these skills critical for anyone building advanced microcontroller projects, smart devices, or innovative automation solutions.
Image courtesy of Bmonster Lab
Debugging ESP32 Code and Common Issues in Arduino IDE
Developing with the ESP32 in the Arduino IDE can be rewarding, but like all embedded development, it comes with its share of debugging challenges. Efficient debugging and troubleshooting are crucial to accelerate your development cycle and ensure reliable project performance. Understanding how to leverage the Arduino IDE’s debugging tools and recognizing common pitfalls can save you time and frustration.
Effective Techniques for Debugging ESP32 Projects
-
Serial Monitor for Real-Time Debugging
Using the Arduino IDE’s Serial Monitor is the most accessible and powerful debugging tool for ESP32 projects. By inserting strategicSerial.print()statements, you can trace program flow, monitor variable values, and diagnose logic errors or unexpected behaviors in real time. -
Enable Verbose Output During Upload and Compilation
Under File > Preferences, enabling verbose output for compilation and upload provides detailed logs that can help identify compiler warnings, errors, or communication failures between your PC and the ESP32 during flashing. -
Use the Built-in LED and GPIOs as Status Indicators
When serial debugging isn’t possible, toggling onboard or external LEDs at critical code segments allows you to visualize the program state or detect if loops or interrupts are executing as expected. -
Employ ESP32-Specific Debugging Libraries
Libraries like ESP32 Debugger or RemoteDebug extend debugging capabilities by enabling telnet or web-based logging, allowing deeper inspection of runtime behavior, especially for Wi-Fi or Bluetooth applications. -
Use Watchdog Timers Carefully
Watchdog timers can automatically reset the ESP32 upon software freezes or deadlocks. While helpful, improper configuration can cause repeated resets, so ensure they are thoughtfully implemented during development or temporarily disabled for debugging sessions.
Troubleshooting Common ESP32 Issues in Arduino IDE
-
Failed to Connect or Upload Errors:
Often caused by incorrect COM port selection, missing USB drivers, or not holding the BOOT button during flashing on some ESP32 boards. Ensuring the latest drivers are installed and double-checking board and port settings solves most upload issues. -
Brownout Detector Resets:
Occur when the ESP32’s power supply dips below recommended voltage levels, causing unexpected resets. Using stable power sources and adding capacitors to smooth power lines can prevent this problem. -
Wi-Fi Connectivity Problems:
Can stem from incorrect SSID/password, Wi-Fi channel conflicts, or outdated firmware. Debug by printing connection status codes and verifying router compatibility. -
Analog Readings Inconsistencies:
The ESP32 ADC is known for non-linear responses; calibrate readings or use averaging techniques in code to improve measurement accuracy. -
Memory and Heap Allocation Errors:
Large arrays, string buffers, or peripheral libraries consuming dynamic memory may cause heap exhaustion, triggering crashes. Optimize memory usage, monitor free heap viaESP.getFreeHeap(), and consider modular code designs.
By integrating these debugging strategies and staying aware of common ESP32 quirks within the Arduino IDE, you can significantly enhance your troubleshooting workflow. This ensures more stable, responsive, and professional-grade embedded systems, empowering you to build robust IoT devices and microcontroller projects with confidence.

Image courtesy of Youn Seung Jin
Optimizing Performance and Power Management on ESP32 with Arduino IDE
When developing embedded applications with the ESP32 using the Arduino IDE, optimizing code performance and managing power consumption are essential for creating efficient, responsive, and battery-friendly devices. The ESP32’s powerful dual-core processor and rich peripherals can quickly become resource-intensive if not carefully managed, impacting both execution speed and energy usage—key factors in IoT and portable applications.
Performance Optimization Strategies
To maximize execution efficiency, consider the following best practices in your Arduino IDE development workflow:
-
Leverage Dual-Core Processing:
ESP32’s dual-core architecture allows you to assign time-critical tasks to a dedicated core using FreeRTOS features accessible via Arduino. Properly distributing workload across cores prevents blocking operations and improves responsiveness. UsexTaskCreatePinnedToCore()for precise core allocation. -
Optimize Bluetooth and Wi-Fi Usage:
Both Wi-Fi and Bluetooth stacks consume significant CPU cycles and power. Use event-driven callbacks and reduce polling frequency to minimize processor load. Disabling unused wireless features when not needed conserves CPU and energy. -
Optimize Memory Usage:
Utilize PROGMEM to store constant data like strings and lookup tables in flash memory rather than RAM, freeing up valuable heap space. Minimize dynamic memory allocations in performance-critical paths to avoid fragmentation and slowdowns. -
Use Efficient Data Types and Functions:
Prefer fixed-width integer types (uint8_t,uint16_t) to reduce processing overhead. Avoid floating-point operations in critical loops when possible—use integer math or fixed-point alternatives for speed.
Power Management Techniques
For battery-operated or energy-sensitive ESP32 projects, managing power consumption extends device lifetime and reliability. Here are the main approaches supported by the Arduino IDE:
-
Deep Sleep Mode:
ESP32 can enter deep sleep and reduce power draw to as low as a few microamps. Useesp_deep_sleep_start()combined with wake-up sources like timers, GPIO interrupts, or the ultra-low-power RTC to maintain low energy consumption during idle periods. -
Light Sleep Mode:
Retains RAM contents and stops the CPU while keeping peripherals active, offering a balance between responsiveness and power reduction. Ideal for intermittent sensor readings or network activity. -
Dynamic Frequency Scaling:
Adjust the CPU frequency at runtime (up to 240 MHz) based on processing demands withsetCpuFrequencyMhz(). Lower frequencies save power during less intensive tasks. -
Peripheral Power Control:
Disable unused peripherals such as Bluetooth, Wi-Fi, ADC, or DAC modules via their APIs or configuration registers to avoid unwanted energy drain.
Implementing these performance and power optimization strategies ensures your ESP32 projects running in the Arduino IDE are not only fast and responsive but also energy-efficient—crucial for embedded designs destined for IoT deployments, portable sensors, and long-term battery-powered applications. By balancing computational capability with thoughtful power management, you can confidently deliver professional-grade, sustainable solutions with the ESP32 platform.

Image courtesy of Youn Seung Jin
OTA Updates and Advanced Features — Exploring Over-The-Air Programming for ESP32 using Arduino IDE
One of the most powerful capabilities of the ESP32 when programmed via the Arduino IDE is the ability to perform Over-The-Air (OTA) updates, enabling wireless firmware uploads without the need for physical USB connections. OTA updates streamline development cycles, facilitate remote device management, and are essential for deploying scalable IoT networks or embedded systems in inaccessible locations.
Getting Started with OTA on ESP32 in Arduino IDE
Implementing OTA updates with the ESP32 involves integrating the ArduinoOTA library, which handles the communication between your development machine and the ESP32 device over Wi-Fi. The process consists of:
- Including the ArduinoOTA library and initializing it in the setup function.
- Connecting the ESP32 to a Wi-Fi network to establish a communication channel.
- Running the ArduinoOTA handle in the main loop to listen for incoming firmware uploads.
- Uploading the new firmware wirelessly directly from the Arduino IDE via the network port instead of USB.
A typical OTA setup enhances your workflow by enabling multiple devices to receive updates remotely, reducing the risk and time involved with on-site manual programming.
Benefits and Use Cases of OTA Updates
- Remote Firmware Management: Update bug fixes, add features, or tweak configurations without physical access to devices.
- Efficient Large-Scale Deployments: OTA is ideal for projects involving clusters of ESP32 nodes spread across factories, agricultural fields, or smart homes.
- Reduced Downtime and Maintenance Costs: Enables quick recovery and improvements, keeping your devices operational without manual intervention.
Advanced Interaction Techniques with ESP32 via Arduino IDE
Beyond OTA, the ESP32 supports several advanced interaction methods to enhance embedded system capabilities:
- Web Server Interface for Configuration: Hosting a lightweight web server on the ESP32 allows users to configure settings, monitor status, or control peripherals through a browser interface remotely.
- MQTT and IoT Protocols: Using MQTT clients on ESP32 facilitates real-time messaging with cloud platforms, essential for home automation and telemetry.
- Touch and Gesture Input: The ESP32’s capacitive touch pins can detect user input, enabling intuitive interfaces without additional hardware.
- Peripheral Interactions with Interrupts and Timers: Efficient event-driven programming using hardware interrupts and timer callbacks ensures responsive and real-time behaviors in embedded applications.
Integrating OTA updates with these advanced features not only enhances your ESP32 projects’ usability but also aligns your development process with modern IoT industry standards. By leveraging wireless programming and interactive controls within the Arduino IDE, you empower your embedded solutions to be highly flexible, maintainable, and future-proof.
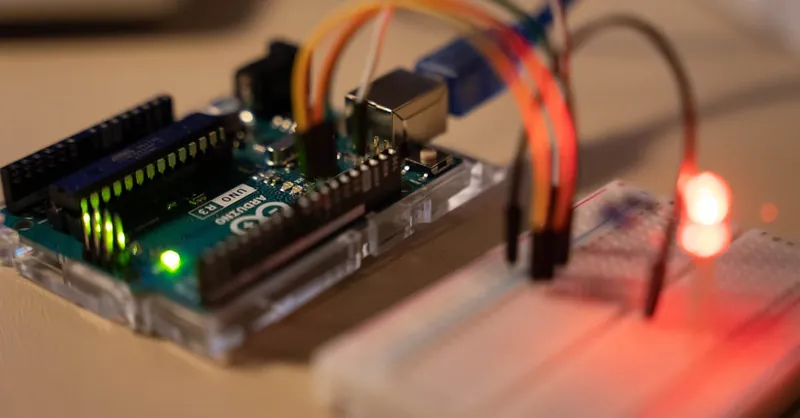
Image courtesy of Chengxin Zhao
Resources for Further Learning and Community Support
As you deepen your journey into ESP32 programming with the Arduino IDE, leveraging high-quality learning resources and engaging with the vibrant community can dramatically accelerate your skill development and project success. The ESP32 ecosystem is rich with comprehensive books, active forums, robust libraries, and powerful tools that cater to both beginners and advanced developers, ensuring you always have guidance and inspiration at your fingertips.
Recommended Books for Mastering ESP32 and Arduino IDE
-
"Getting Started with ESP32" by Neil Kolban
A detailed guide offering in-depth explanations of the ESP32 hardware, peripherals, and programming examples—including Arduino IDE usage—that builds a strong foundation for embedded system developers. -
"Programming Arduino: Getting Started with Sketches" by Simon Monk
Ideal for newcomers, this book covers Arduino programming fundamentals, with practical insights applicable to ESP32 when programmed via the Arduino environment. -
"Internet of Things with ESP32" by Agus Kurniawan
Focused on real-world IoT projects, this book explores advanced ESP32 capabilities like Wi-Fi, Bluetooth, and MQTT integration, providing extensive Arduino code snippets and deployment strategies.
Essential Online Forums and Communities
-
ESP32 Forum (https://esp32.com/):
The official community hub where you can find discussions on troubleshooting, new features, and project ideas, curated and frequented by ESP32 developers and Espressif engineers. -
Arduino Forum (https://forum.arduino.cc/):
A broad Arduino-based development discussion platform with dedicated sections for ESP32 topics, where you can ask questions, share code, and discover community-driven solutions. -
Stack Overflow (https://stackoverflow.com/questions/tagged/esp32):
A vast Q&A resource with many answered questions on ESP32 programming and Arduino IDE specifics, perfect for solving coding challenges quickly. -
Reddit r/esp32 and r/arduino:
Informal but active subreddits for sharing projects, news, and support from hobbyists and professionals alike.
Must-Have Libraries and Tools to Enhance ESP32 Development
-
ESP32 Core for Arduino:
The essential Arduino core package maintained by Espressif adding full ESP32 support to Arduino IDE, regularly updated with performance improvements and new features. -
AsyncTCP and ESPAsyncWebServer:
Libraries engineered for efficient networking and web server functionality, enabling scalable IoT solutions and responsive embedded web interfaces. -
PlatformIO:
Although optional, this powerful alternative IDE and build system supports ESP32 projects with advanced debugging, library management, and multi-platform builds enhancing productivity beyond the standard Arduino IDE. -
Espressif’s ESP-IDF (ESP32 IoT Development Framework):
For developers ready to advance beyond Arduino, ESP-IDF offers the official SDK with full access to ESP32 features and optimizations, with Arduino compatibility layers available. -
Serial Debugging Tools:
Utilities like PuTTY, CoolTerm, or Arduino’s built-in Serial Monitor are invaluable for real-time diagnostics and iterative development.
Continuous Learning Tips
- Regularly follow official Espressif documentation and GitHub repositories for firmware updates and examples.
- Experiment with sample projects on GitHub, where you can find thousands of open-source ESP32 Arduino sketches covering sensors, communication protocols, and IoT platforms.
- Participate in online courses and tutorials focused on embedded systems and ESP32 programming to build structured knowledge.
- Join local maker groups or hackathons to collaborate and learn hands-on with the ESP32 and Arduino IDE.
By incorporating these authoritative books, tapping into knowledgeable communities, and utilizing powerful libraries and tools, you continuously enhance your ESP32 programming expertise and keep pace with industry advancements. This proactive approach not only sharpens your embedded systems skills but also inspires innovation, enabling you to build robust, scalable, and cutting-edge ESP32 projects using the familiar Arduino IDE platform.
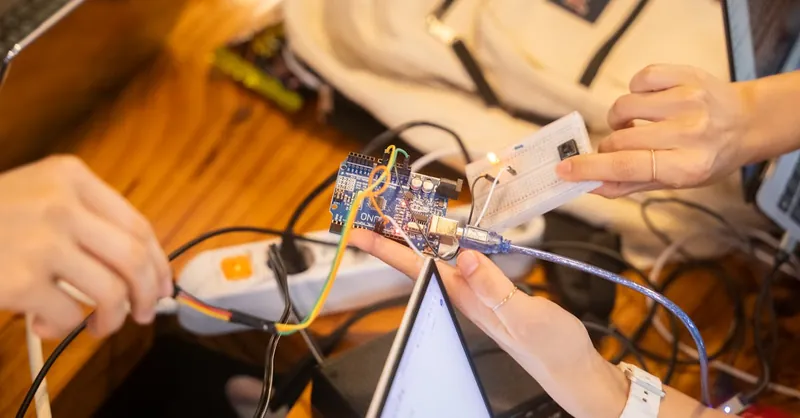
Image courtesy of Youn Seung Jin