Learning Embedded C for Beginners: A Complete Starter Guide
Category: Embedded Systems
Master Embedded C: Your First Step Into Microcontroller Programming
If you’re a tech enthusiast, hobbyist, or developer fascinated by Raspberry Pi and microcontroller projects, diving into embedded C programming is a crucial skill to master. Yet, the journey from knowing general programming concepts to confidently writing embedded C code can feel overwhelming. You’ve likely searched for resources that break down the principles of embedded C clearly and provide practical steps — not just theory — to help you build projects effectively.
This guide is tailored specifically for beginners who want a comprehensive introduction that balances foundational knowledge and hands-on application. We understand your challenges: dealing with unfamiliar hardware constraints, mastering bitwise operations, and interfacing directly with microcontrollers. Unlike generic C tutorials, this post focuses on embedded systems development — an essential skill set for anyone eager to create robust, efficient microcontroller-based projects.
By walking you through everything from basic syntax to working with hardware registers, this post will equip you with the tools needed to start writing embedded C code confidently. Whether your next project involves sensors, motors, or communication protocols, you’ll find actionable insights here crafted for your skill level. Keep reading to embark on a practical, step-by-step journey into embedded C that aligns perfectly with your interests in Raspberry Pi, Python, C/C++, and beyond.
- Master Embedded C: Your First Step Into Microcontroller Programming
- Understanding Embedded Systems: Key Concepts and Differences from Standard Programming
- Setting Up Your Development Environment: Tools, Compilers, and Simulators for Embedded C
- Basics of Embedded C Language: Data Types, Operators, and Control Structures
- Working with Microcontroller Architecture: Memory, Registers, and Peripherals
- Writing Your First Embedded C Program: Blinking an LED with GPIO Manipulation
- Interrupts and Timers: How Embedded C Handles Real-Time Events
- Interfacing with Sensors and Actuators: Reading ADC Values and Controlling Devices
- Debugging Embedded Systems: Techniques and Tools to Troubleshoot Your Code
- Best Practices for Embedded C Programming: Code Optimization and Portability Tips
- Advanced Concepts Overview: Communication Protocols (I2C, SPI, UART) and RTOS Basics
Understanding Embedded Systems: Key Concepts and Differences from Standard Programming
Before diving deeper into embedded C programming, it’s essential to grasp what embedded systems truly are and how they differ from standard desktop or web programming. Embedded systems are specialized computing units designed to perform dedicated functions within larger mechanical or electrical systems. Unlike general-purpose computers, these systems work within hardware-constrained environments with strict requirements on reliability, performance, and real-time operation.
Key Characteristics of Embedded Systems
- Resource Constraints: Embedded devices often have limited CPU power, memory (RAM and flash), and storage. Understanding these constraints shapes how you write efficient, low-level C code.
- Real-Time Operation: Many embedded applications require precise timing and immediate response to events, making real-time processing a critical concept.
- Hardware Interaction: Embedded C programming involves direct manipulation of hardware registers, peripherals, and I/O pins — a layer abstracted away in typical software development.
- Deterministic Behavior: Predictability and stability are paramount; embedded systems must behave consistently under all operating conditions.
How Embedded Programming Differs from Standard Programming
| Aspect | Embedded Programming | Standard Programming |
|---|---|---|
| Environment | Runs on microcontrollers or microprocessors | Runs on PCs, servers, or virtual machines |
| Resource Availability | Limited CPU, RAM, and power | Often abundant resources |
| Hardware Access | Direct access to hardware registers and interrupts | Indirect through OS interfaces |
| Programming Focus | Real-time, low-level control and optimization | User interface, high-level abstractions |
| Debugging Tools | Often hardware debuggers and simulators | Software-based debuggers and profilers |
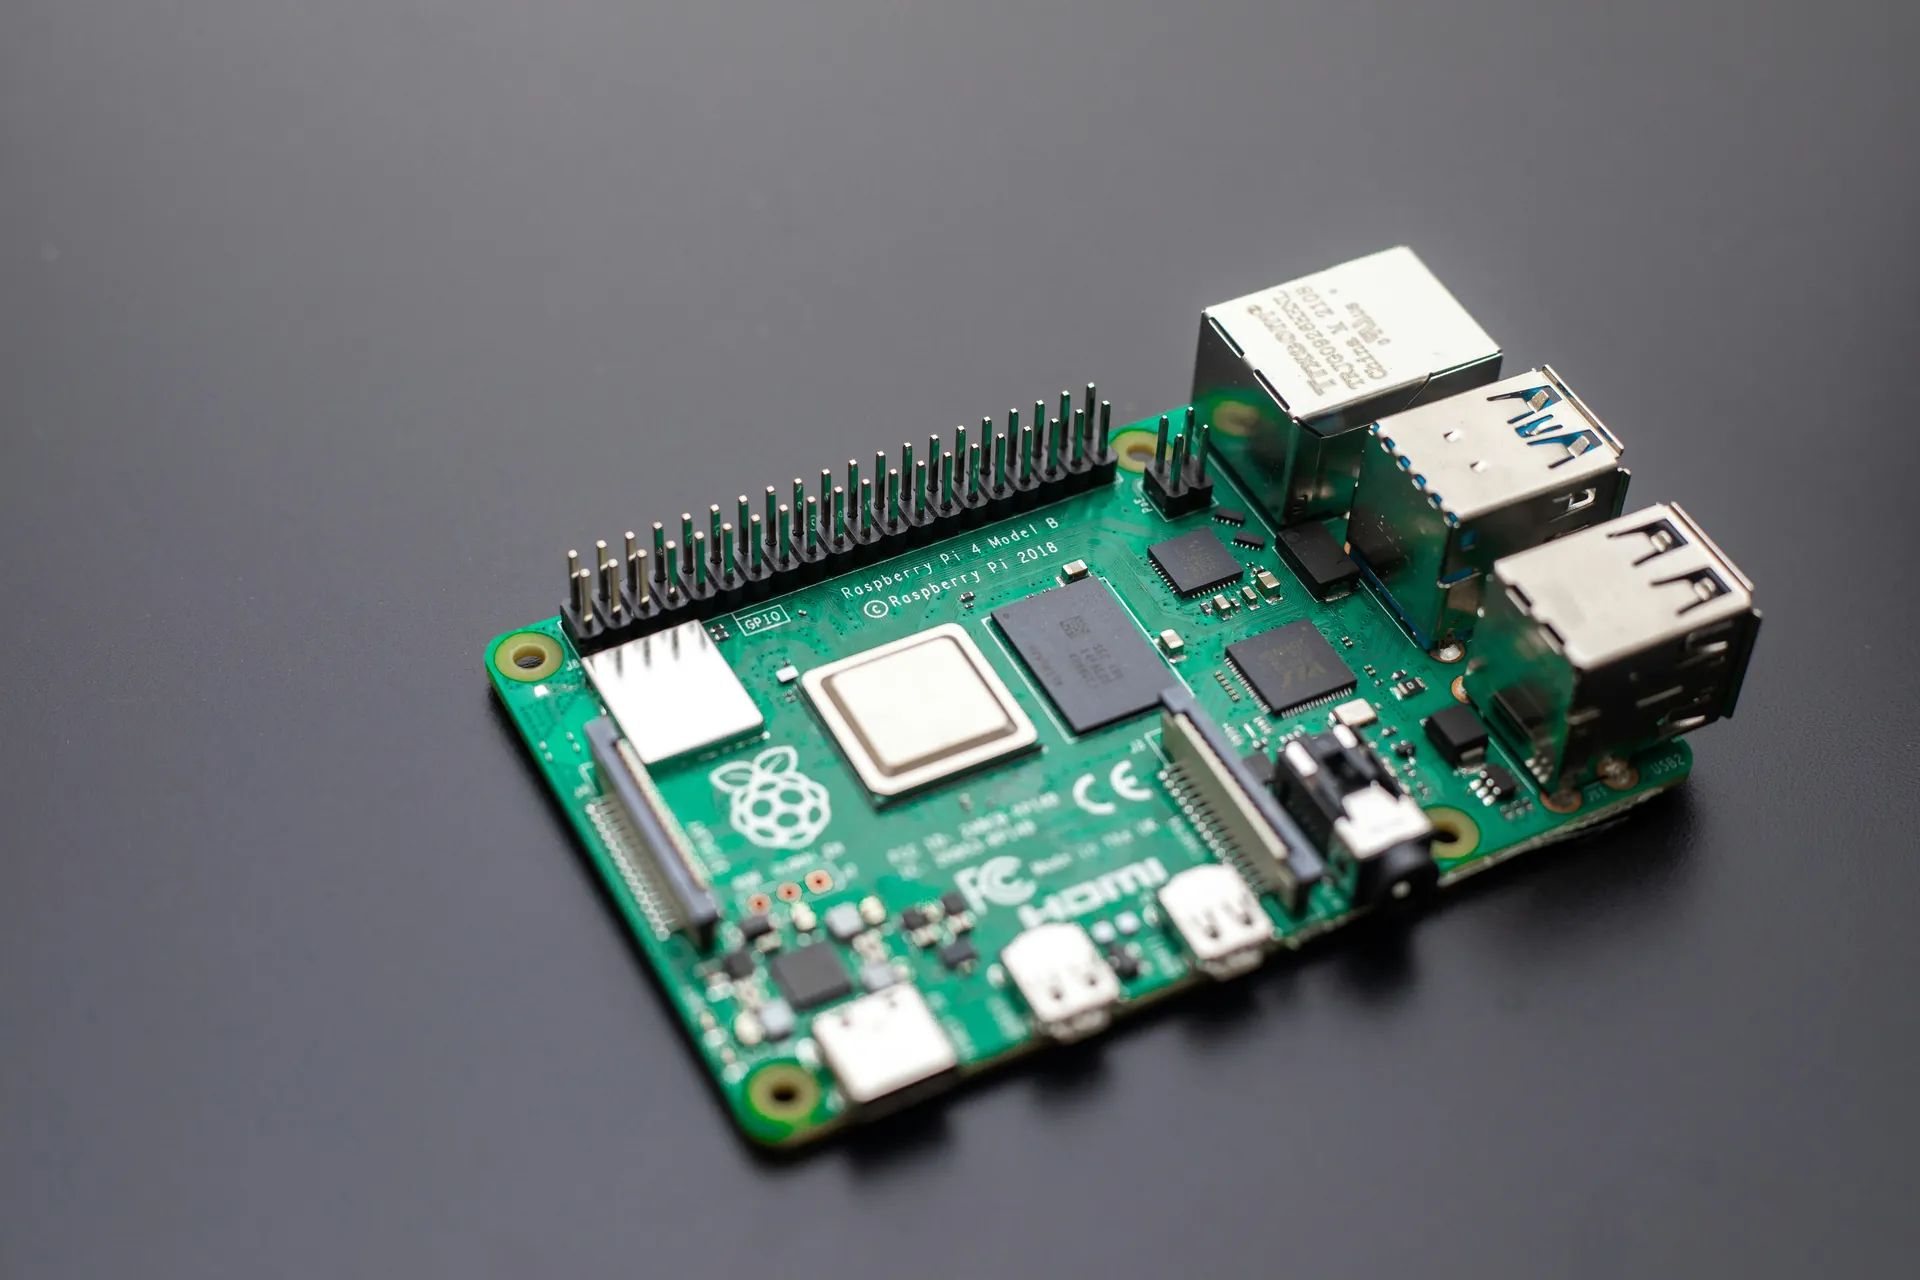
Mastering embedded C means adapting your programming mindset to optimize for these factors. This approach empowers you to create reliable, fast, and efficient code tailored specifically for hardware devices — the foundation of all creative Raspberry Pi and microcontroller projects. Understanding these distinctions is your first big step toward becoming proficient in embedded systems development.

Image courtesy of Thirdman
Setting Up Your Development Environment: Tools, Compilers, and Simulators for Embedded C
Getting started with embedded C programming requires more than just understanding syntax—you need a reliable development environment tailored for microcontroller projects. Setting up the right tools is crucial for smooth coding, compiling, debugging, and testing embedded applications. Unlike desktop C programming, embedded development often involves cross-compilers, hardware-specific toolchains, and simulators to emulate microcontroller behavior before deploying code to physical devices.
Essential Tools for Embedded C Development
- Code Editor or Integrated Development Environment (IDE):
While you can write embedded C code in any text editor, specialized IDEs provide syntax highlighting, code completion, and built-in debugging features optimized for embedded systems. Popular choices include: - Eclipse IDE with CDT (C/C++ Development Tooling)
- Keil µVision (widely used for ARM-based microcontrollers)
- Atmel Studio (ideal for AVR microcontrollers)
- PlatformIO (versatile, supports multiple boards and frameworks)
These IDEs streamline writing and managing embedded C projects, making them accessible for beginners.
- Cross-Compiler Toolchain:
Embedded C compilers translate human-readable code into machine instructions that the microcontroller can understand. Since your development computer likely uses an x86 or ARM processor, you need a cross-compiler targeting your microcontroller’s architecture (e.g., ARM Cortex-M, AVR, PIC). Examples include: - GCC ARM Embedded Toolchain (open-source and widely supported)
- Microchip MPLAB XC Compilers (AVR, PIC microcontrollers)
-
IAR Embedded Workbench (commercial, with advanced optimization)
-
Programmer/Debugger Hardware:
To load your compiled code onto the microcontroller and debug it in real time, hardware debuggers or programmers are essential. Common devices are: - Segger J-Link
- ST-Link
- AVR ISP
These interfaces connect to your development PC via USB and communicate with the microcontroller’s debug port, enabling step-through debugging and hardware inspection.
- Simulators and Emulators:
Simulators replicate the microcontroller environment on your PC, letting you test embedded C code without physical hardware. While simulators might not perfectly emulate all hardware peripherals, they are invaluable for learning and basic testing. Notable tools include: - Renode (open-source, excellent for complex embedded systems simulation)
- Proteus VSM (commercial, combines simulation with schematic capture)
- QEMU (mainly used for ARM platforms)
Tips for Beginners When Setting Up
- Choose a Supported Microcontroller: Start with popular, beginner-friendly boards like the STM32 series, Arduino (AVR-based), or Raspberry Pi Pico (RP2040). Their extensive community support and available toolchains make setup easier.
- Install Toolchains Carefully: Verify that the compiler version matches your microcontroller architecture to avoid compatibility issues.
- Leverage Online Resources: Many IDEs and compilers provide ready-made examples, tutorials, and templates to jumpstart your projects.
- Start Simple: Begin by writing, compiling, and simulating basic embedded C programs before progressing to hardware debugging and peripheral integration.
By assembling a robust development environment with proper tools, compilers, and simulators, you'll create a solid foundation for mastering embedded C. This preparation ensures that once you start coding, uploading, and debugging microcontroller projects, the workflow is as smooth and efficient as possible—setting you up for success in your embedded systems journey.

Image courtesy of Markus Spiske
Basics of Embedded C Language: Data Types, Operators, and Control Structures
To effectively program microcontrollers with embedded C, it’s essential to first understand the basic building blocks of the language. Embedded C closely mirrors standard C but emphasizes efficiency and precise control over hardware resources, making mastery of data types, operators, and control structures fundamental for writing robust, low-level embedded code.
Data Types in Embedded C: Choosing the Right Type for Your Microcontroller
Embedded systems often operate with stringent memory and processing limits, so selecting the appropriate data types is crucial. Unlike desktop programming where you may have abundant memory, embedded C requires you to optimize for size, speed, and hardware compatibility.
- Integer Types:
int,short,long,long long— vary in size by platform, so use fixed-width types likeint8_t,uint16_t,int32_tfrom<stdint.h>for portability and precision.-
Use unsigned types (e.g.,
uint8_t) when dealing with binary data or hardware registers to avoid unexpected sign extension. -
Floating-Point Types:
floatanddoubleare available but typically avoided in time- or resource-critical embedded applications due to slower processing and increased code size.-
Some microcontrollers lack hardware floating-point units (FPUs), making floating-point operations inefficient.
-
Boolean Type:
-
Use
_Boolor theboolkeyword (#include <stdbool.h>) for clear, readable conditional flags. -
Pointers and Volatile Keyword:
- Pointers allow direct manipulation of memory addresses, essential for hardware register access.
- The
volatilequalifier tells the compiler a variable can change unexpectedly (e.g., hardware registers, interrupt flags), preventing unwanted optimizations that can cause bugs.
Operators: Bitwise and Logical for Hardware Control
Embedded C programming relies heavily on bitwise operators to manipulate hardware registers and control individual bits efficiently:
&(AND),|(OR),^(XOR),~(NOT)- Bit shifting operators:
<<(left shift),>>(right shift) to set, clear, or toggle bits.
Logical operators like &&, ||, and relational operators (==, !=, <, >) remain essential for conditional checks but bitwise operations are particularly powerful for embedded applications, such as configuring control registers or reading status flags.
Control Structures: Managing Flow for Real-Time Embedded Systems
Like standard C programming, embedded C uses control structures to execute code conditionally and iteratively. These structures form the backbone of embedded software logic and event handling:
- Conditional Statements:
if,else if,else, andswitchstatements allow your code to react to sensor inputs, button presses, or hardware states. - Loops:
for,while, anddo-whileloops manage repeated tasks like polling peripherals or implementing delays. - Break and Continue: Control loop execution carefully to prevent non-responsive or stuck microcontrollers.
In embedded contexts, keeping control flow deterministic and efficient is particularly important for real-time responsiveness, ensuring your microcontroller reacts swiftly and predictably to inputs and interrupts.
Understanding these core components of embedded C empowers you to write clear, optimized, and maintainable code for microcontroller programming. Mastery over data types, operators, and control structures sets the stage for more advanced topics like interrupt handling, peripheral interfacing, and memory management in embedded systems.

Image courtesy of Seraphfim Gallery
Working with Microcontroller Architecture: Memory, Registers, and Peripherals
To write effective embedded C code, it’s essential to understand the microcontroller architecture, especially how it manages memory, registers, and peripherals. Unlike high-level programming on general-purpose computers, embedded systems demand direct interaction with hardware components. Mastery of this hardware abstraction enables you to control the microcontroller precisely, optimize resource usage, and troubleshoot effectively.
Memory Organization: Flash, SRAM, and Special Function Registers
Microcontrollers typically have multiple memory types, each serving distinct roles:
-
Flash Memory (Program Memory):
This non-volatile memory stores your compiled embedded C program code. It retains its contents even without power, enabling your microcontroller to boot and execute your firmware every time it runs. Understanding the size limits of flash is crucial, as embedded applications must fit within these constraints. -
Static RAM (SRAM):
SRAM provides volatile storage for variables, stack, and runtime data. Since SRAM is limited—often just a few kilobytes—you must optimize memory usage carefully. Using smaller data types and minimizing global or large arrays is a common embedded C best practice. -
Special Function Registers (SFRs):
These registers provide direct access to microcontroller peripherals and hardware features such as timers, I/O ports, and communication modules. They reside at fixed memory addresses mapped into the microcontroller’s memory space. Your embedded C code reads and writes these registers to configure and control hardware behavior.
CPU Registers: The Heart of Microcontroller Processing
Microcontrollers contain a set of CPU registers—small, fast storage locations used during instruction execution for operations and data handling. While many registers are managed implicitly by the compiler, embedded programmers often use or manipulate specific registers for:
- Status registers: Hold flags indicating zero, carry, overflow, or interrupt status essential for decision-making.
- General-purpose registers: Used for arithmetic, logic operations, and temporary data storage.
- Pointer registers: Facilitate efficient access to memory or peripherals, especially in assembly inserts or advanced embedded C use.
Understanding register-level operations helps you optimize code speed and memory footprint, crucial for time-critical embedded systems.
Peripherals: Interfacing External Components Through Registers
A hallmark of embedded programming is controlling hardware peripherals such as GPIO, ADC, timers, UART, SPI, and I2C modules. These peripherals are controlled by configuring specific SFR bits through your embedded C code. For example:
- Setting a GPIO direction register bit configures a pin as input or output.
- Writing to a timer control register enables precise periodic interrupts.
- Reading the UART status register checks data reception readiness for serial communication.
Embedded C leverages bitwise operators extensively here to set, clear, toggle, or read individual bits within these registers efficiently.
Practical Tips for Beginners
- Always consult your microcontroller’s datasheet and reference manual to understand exact memory maps, register addresses, and peripheral capabilities.
- Use
volatilekeyword when accessing hardware registers to prevent the compiler from optimizing away essential reads/writes. - Prefer defining registers and bit masks using symbolic names via header files instead of hardcoding addresses and bit positions, improving code clarity and portability.
Grasping microcontroller memory, register structures, and peripheral interfacing is fundamental to embedded C programming success. This knowledge bridges the gap between your code and the physical device, unlocking the power to build creative, efficient, and responsive microcontroller projects.

Image courtesy of Tima Miroshnichenko
Writing Your First Embedded C Program: Blinking an LED with GPIO Manipulation
One of the most classic and beginner-friendly projects to start embedded C programming is blinking an LED using GPIO (General Purpose Input/Output) pin control. This simple exercise not only familiarizes you with the basics of hardware register manipulation but also introduces essential embedded programming concepts such as configuring I/O pins, implementing delays, and controlling microcontroller peripherals directly through code.
Understanding GPIO and Its Role in Embedded Systems
GPIO pins serve as the fundamental interface between the microcontroller and external hardware components like LEDs, buttons, and sensors. By setting a GPIO pin as an output and toggling its state between high and low voltage levels, you control devices such as LEDs to turn on and off. This process involves:
- Configuring the GPIO pin direction (input or output) by setting specific bits in the microcontroller’s GPIO direction register.
- Writing to the GPIO output register to set the pin high (usually 3.3V or 5V) or low (0V) to switch the LED on or off.
- Employing delays to create a visible blinking pattern, which requires careful timing since busy-wait loops are common in bare-metal embedded systems.
Basic Structure of a Blinking LED Program in Embedded C
Here’s an overview of the essential steps and embedded C constructs involved in writing your first LED blink program:
- Include necessary header files: These typically contain microcontroller-specific definitions for registers and bit masks.
- Define GPIO pin and port: Use symbolic constants for readability and easy modification.
- Initialize GPIO: Set the pin as an output by configuring the corresponding direction register bit.
- Create an infinite loop: Embedded systems typically run endless loops; inside this loop:
- Turn the LED on by setting the output bit.
- Call a delay function to keep the LED lit for a specific duration.
- Turn the LED off by clearing the output bit.
- Call the delay function again to keep the LED off before the next cycle.
Inside the loop, the GPIO operations involve bitwise manipulation to set or clear bits without affecting other pins — a core embedded C skill. For example:
GPIO_PORT |= (1 << LED_PIN);   // Set LED_PIN bit to turn LED on
GPIO_PORT &= ~(1 << LED_PIN);  // Clear LED_PIN bit to turn LED off
Tips for Writing Effective Embedded C Blink Programs
- Use the
volatilekeyword for GPIO registers to prevent compiler optimizations that might skip essential hardware accesses. - Implement the delay function using simple loops initially but plan to replace it later with hardware timers for precise, power-efficient delays.
- Always refer to your microcontroller’s datasheet to confirm GPIO register addresses and bit positions.
- Test your code first with a simulator if available, then upload it to the target hardware using a programmer/debugger tool.
By mastering LED blinking with direct GPIO register control, you build a practical understanding of embedded C programming fundamentals—register-level manipulation, using bitwise operators, and managing timing. This foundational skill will empower you to tackle more complex applications such as sensor interfacing, motor control, and communication protocols on platforms like Raspberry Pi Pico and other microcontrollers.

Image courtesy of Chengxin Zhao
Interrupts and Timers: How Embedded C Handles Real-Time Events
In embedded systems, real-time responsiveness is critical—your microcontroller must react instantly to external events like sensor signals, communication requests, or user inputs. This is where interrupts and timers become indispensable. Embedded C provides powerful mechanisms to handle these asynchronous events efficiently, allowing your program to respond immediately without constantly polling hardware.
What Are Interrupts and Why Are They Important?
An interrupt is a hardware-triggered signal that temporarily halts the normal execution flow of your program to run a special function called an Interrupt Service Routine (ISR). Once the ISR completes, execution returns to the main program. Interrupts enable your microcontroller to manage multiple concurrent tasks with minimal latency, making them essential for real-time applications like:
- Detecting button presses or sensor triggers instantly
- Handling data reception on serial ports (UART, SPI, I2C)
- Responding to hardware faults or system timers
Embedded C leverages interrupts by allowing you to write ISRs with specific syntax and attributes that the compiler recognizes. Proper use of volatile variables inside ISRs and synchronization between main code and interrupts ensures reliable, deterministic behavior critical for embedded projects.
Timers: Scheduling Tasks and Generating Precise Delays
Timers are hardware peripherals that count clock cycles and generate interrupts after a specified interval. They are fundamental for implementing:
- Periodic tasks such as sensor readings or communication timeouts
- PWM (Pulse Width Modulation) signals for motor control
- Accurate software delays without blocking CPU resources
By configuring timer registers through embedded C code, you can set up timers to trigger interrupts at precise time intervals, freeing your main program to perform other tasks or enter low-power modes. Utilizing timers instead of delay loops enhances efficiency, power consumption, and timing accuracy in embedded systems.
Key Embedded C Concepts for Working with Interrupts and Timers
To master interrupts and timers in embedded C, focus on:
- Declaring ISRs correctly, often using compiler-specific keywords or pragmas. For example,
__attribute__((interrupt))in GCC orISR(vector)macros in AVR. - Enabling and configuring interrupt sources and priorities through specific interrupt mask and control registers.
- Using the
volatilekeyword for variables shared between ISRs and main code to prevent compiler optimizations. - Clearing interrupt flags inside ISRs to avoid retriggering and ensure proper event handling.
- Setting up timer registers (prescaler, counter, compare match) to schedule periodic interrupts accurately.
Embedding interrupt-driven programming and timer management into your embedded C skill set unlocks advanced real-time capabilities. This knowledge empowers you to build responsive, multitasking microcontroller applications ideal for dynamic Raspberry Pi and microcontroller projects demanding precision and efficiency.

Image courtesy of Pixabay
Interfacing with Sensors and Actuators: Reading ADC Values and Controlling Devices
A core strength of embedded C programming is its ability to interface directly with sensors and actuators, bridging the physical world with digital logic. Whether you’re measuring temperature, pressure, light intensity, or controlling motors, relays, and LEDs, understanding how to read analog sensor data and control output devices is paramount for every beginner in embedded systems development.
Reading Analog Inputs Using ADC (Analog-to-Digital Converter)
Most microcontrollers integrate an ADC module that converts real-world analog signals into digital values your embedded C program can process. Interfacing with sensors like temperature probes, potentiometers, or ambient light sensors requires:
- Configuring ADC Control Registers: Set up the ADC clock, resolution (commonly 10 or 12 bits), reference voltage, and input channels through specific microcontroller registers using embedded C.
- Starting an ADC Conversion: Trigger the ADC process by setting bits in control registers, often through bitwise operations.
- Polling or Interrupt-Driven Completion: Wait for the conversion to complete by checking status flags or handling ADC interrupts to read reliable data efficiently.
- Reading the Digital Result: Access the ADC data register containing the converted value, then scale or calibrate it based on your sensor specifications for meaningful measurements.
By mastering ADC interfacing in embedded C, you can accurately capture sensor signals to monitor environmental variables, enabling a vast range of projects from weather stations to robotics.
Controlling Actuators: Output Devices and Peripheral Commands
On the output side, embedded C empowers you to control actuators such as motors, buzzers, LEDs, or solenoids through peripherals like GPIOs, PWM modules, and communication interfaces. Key techniques include:
- GPIO Pin Manipulation: Set output pins high or low to turn devices on/off or trigger switches. Using bitwise operators enables precise, atomic control over these pins without disturbing other connected components.
- PWM Signal Generation: Generate pulse width modulated signals via timer peripherals to control motor speeds, LED brightness, or servo positions — essential in robotics and automation.
- Serial Communication Protocols: Drive actuators connected via I2C, SPI, or UART by sending commands through respective peripheral registers, facilitating complex device control and feedback.
Best Practices for Sensor and Actuator Interfacing in Embedded C
- Always declare ADC data registers and hardware control registers as
volatileto ensure correct read/write operations without compiler optimizations skipping crucial hardware access. - Use bit masking and shifting to isolate specific bits or fields in ADC and peripheral registers, ensuring non-disruptive updates to other settings.
- Implement calibration routines in your embedded C code to convert raw ADC values into accurate real-world units (e.g., °C, Lux).
- When controlling actuators, respect the device’s electrical characteristics by integrating proper driver circuits, and use embedded C code to implement safety checks like current limiting or fault detection.
By integrating sensor reading and actuator control seamlessly into your embedded C programs, you unlock the full potential of microcontrollers to sense, respond, and manipulate the physical environment precisely. This skill is fundamental for creative Raspberry Pi and microcontroller projects that rely on real-world data acquisition and interaction—making it an essential milestone in your embedded systems learning journey.

Image courtesy of Jakub Zerdzicki
Debugging Embedded Systems: Techniques and Tools to Troubleshoot Your Code
Debugging embedded C code can be one of the biggest challenges for beginners stepping into microcontroller programming. Unlike traditional software development, embedded systems run on hardware with limited resources, no standard output consoles, and potential timing constraints that complicate troubleshooting. To become proficient in embedded C, mastering debugging techniques and tools tailored for embedded environments is essential for identifying and resolving issues efficiently.
Common Challenges in Debugging Embedded Systems
- Lack of Standard Output: Many microcontrollers do not have displays or terminals, making it difficult to print debug information directly.
- Real-Time Constraints: Interrupts and timing-sensitive code may behave differently during debugging, leading to elusive bugs.
- Hardware Interactions: Misconfigured registers or peripheral setups can cause faults that are not always reflected clearly in software.
- Memory Limitations: Limited RAM and program space reduce the ability to use heavy debugging code or instrumentation.
Essential Debugging Techniques for Embedded C
-
Use of Hardware Debuggers and In-Circuit Emulators (ICE):
Tools like Segger J-Link, ST-Link, or AVR-ISP enable step-by-step execution, real-time variable inspection, breakpoints, and single-stepping through code on the actual microcontroller. This low-level debugging offers unparalleled insight into program flow and hardware status. -
Serial Debug Output:
Implement a lightweight logging system via UART or USB CDC ports to send debug messages to a PC terminal. Even simple print statements can help track program execution or variable states without disrupting timing as much as heavier debugging tools. -
LED and GPIO Signaling:
Utilize onboard LEDs or spare GPIO pins to signal program states or error conditions. For example, toggling an LED on critical errors gives a visual cue during testing when console access isn’t feasible. -
Use of Assertions and Watchdog Timers:
Embedding assertion checks in critical code sections can catch invalid states early, while watchdog timers help recover from program hangs by resetting the microcontroller, indicating a fault condition. -
Simulation and Emulation:
Before deploying on hardware, leverage simulators like QEMU or Renode to run and debug embedded C code in a controlled virtual environment, which can reduce development cycles and hardware wear. -
Memory and Stack Analysis:
Monitor stack usage and heap allocations carefully. Embedded systems often crash due to stack overflows or memory corruption, so tools or compiler options that visualize memory footprints are invaluable.
Best Practices for Effective Embedded Debugging
- Always start with simple, incremental tests instead of complex programs to isolate issues early.
- Regularly consult your microcontroller datasheet and reference manuals to understand hardware-specific error conditions and status registers.
- Keep debug code and logging minimal and removable to preserve real-time performance in production builds.
- Document known issues and debugging steps taken to build a personal knowledge base that accelerates future troubleshooting.
By honing these debugging skills and thoughtfully applying embedded-specific tools, you can dramatically improve your ability to troubleshoot embedded C code effectively. This competence not only accelerates your development process but also builds the confidence to tackle complex microcontroller projects on platforms like Raspberry Pi, Arduino, and STM32—key to thriving in the world of embedded systems development.

Image courtesy of Thirdman
Best Practices for Embedded C Programming: Code Optimization and Portability Tips
When learning embedded C programming, beginners often focus on getting their code to work, but mastering code optimization and portability is equally essential for creating efficient, maintainable, and reusable embedded applications. Optimized embedded C code not only runs faster and consumes fewer resources but also ensures your projects can be easily adapted to different microcontrollers or platforms without extensive rewrites.
Code Optimization Techniques in Embedded C
Optimization in embedded systems primarily targets reduced memory footprint, faster execution, and lower power consumption—all critical due to hardware constraints. Key practices include:
-
Use Fixed-Width Data Types:
Utilizing types such asuint8_t,int16_t, anduint32_tfrom<stdint.h>ensures predictable variable sizes across different platforms, improving both performance and portability. -
Minimize Use of Floating-Point Operations:
Avoid floating-point arithmetic whenever possible since many microcontrollers lack hardware floating-point units (FPUs), leading to slow, power-intensive software emulation. Instead, opt for integer math or fixed-point calculations. -
Leverage Bitwise Operations:
Use bit masking, shifting, and logical operators to manipulate hardware registers efficiently without affecting unrelated bits. This reduces code size and enhances execution speed. -
Avoid Unnecessary Function Calls and Variables:
Inline small, frequently used functions using theinlinekeyword to reduce overhead. Also, limit global variables and use local variables wisely to optimize stack usage. -
Optimize Loops and Conditionals:
Keep loops simple and avoid complex conditions inside frequently executed loops. Use deterministic constructs to meet real-time constraints and prevent latency spikes. -
Use Compiler Optimization Flags:
Modern embedded C compilers provide optimization options (e.g.,-O2,-Os) to automatically apply safe transformations, improving code speed or size. Test thoroughly, as aggressive optimizations can sometimes alter timing or behavior.
Ensuring Portability in Embedded C Programs
Portability allows your embedded applications to run across different microcontrollers and development environments with minimal changes, a valuable trait for scalable projects. To enhance portability:
-
Isolate Hardware-Dependent Code:
Encapsulate microcontroller-specific register definitions, peripheral initializations, and IO operations within dedicated modules or header files. This separation simplifies adapting your code to new hardware by modifying only hardware abstraction layers. -
Use Standard Libraries and APIs:
Whenever possible, rely on standardized headers like<stdint.h>,<stdbool.h>, and CMSIS (Cortex Microcontroller Software Interface Standard) APIs rather than vendor-specific implementations. -
Avoid Hardcoding Addresses and Magic Numbers:
Define meaningful macros or constants for register addresses, bit masks, and hardware parameters to increase readability and adaptability. -
Document Assumptions and Hardware Dependencies:
Clearly comment code regions that interface directly with hardware or depend on clock speeds, voltage levels, or peripheral configurations to help future maintenance or porting efforts.
By integrating code optimization and portability best practices into your embedded C development workflow, you ensure your Raspberry Pi and microcontroller projects are not only efficient and reliable but also flexible enough to evolve with your growing hardware experimentation. These strategies reduce debugging time, improve performance, and foster reusable codebases—cornerstones of professional embedded systems development.

Image courtesy of Rodrigo Santos
Advanced Concepts Overview: Communication Protocols (I2C, SPI, UART) and RTOS Basics
As you progress beyond the fundamentals of embedded C programming, gaining proficiency in communication protocols and understanding the basics of Real-Time Operating Systems (RTOS) becomes essential. These advanced topics enable your microcontroller to interact seamlessly with external devices and manage complex tasks efficiently, powering sophisticated Raspberry Pi and microcontroller projects.
Communication Protocols: I2C, SPI, and UART Essentials
Communication protocols form the backbone of data exchange in embedded systems, allowing microcontrollers to connect with sensors, actuators, displays, and other peripherals. Among the most widely used serial communication standards are I2C, SPI, and UART. Mastering these protocols in embedded C broadens your project scope, enabling multi-device integration and reliable system control.
- I2C (Inter-Integrated Circuit):
- A two-wire, synchronous communication bus (SDA for data and SCL for clock) designed for short-distance communication between microcontrollers and low-speed peripherals.
- Supports multiple master and slave devices on the same bus, each identified by unique addresses.
- Embedded C programming involves configuring the I2C control registers, managing start/stop conditions, addressing and acknowledgment bits, and handling interrupts for efficient data transfer.
-
Ideal for interfacing with EEPROMs, RTC modules, and environmental sensors.
-
SPI (Serial Peripheral Interface):
- A high-speed, synchronous, full-duplex protocol using four wires: MOSI (Master Out Slave In), MISO (Master In Slave Out), SCLK (clock), and CS (Chip Select).
- Generally supports a single master with multiple slaves, selected via CS lines.
- Embedded C implementation requires managing SPI control registers, clock polarity and phase settings, and chip select lines to facilitate fast data exchange.
-
Frequently used for SD cards, displays, and high-speed sensors.
-
UART (Universal Asynchronous Receiver/Transmitter):
- An asynchronous, point-to-point protocol using two wires: RX (receive) and TX (transmit).
- Communication parameters such as baud rate, data bits, parity, and stop bits must be set precisely in the UART peripheral registers.
- Interrupts or polling can be used in embedded C to handle data reception and transmission efficiently.
- Commonly utilized for serial communication with PCs, GPS modules, and Bluetooth devices.
By integrating these communication protocols into your embedded C projects, you establish robust pathways for sensor data acquisition, command transmission, and module coordination—key for creating interactive and scalable microcontroller systems.
RTOS Basics: Introducing Real-Time Task Management in Embedded C
As embedded applications grow in complexity, relying solely on a super-loop or interrupt-driven design can become inefficient and difficult to maintain. This is where a Real-Time Operating System (RTOS) plays a vital role by providing deterministic scheduling, multitasking, and resource management capabilities.
- An RTOS allows multiple tasks or threads to run seemingly simultaneously by managing CPU time slices, ensuring real-time responsiveness and priority-based execution.
- Core RTOS features include task creation and deletion, inter-task communication (queues, semaphores), time management (delays, timers), and synchronization mechanisms.
- Popular lightweight RTOS options for microcontrollers include FreeRTOS, Zephyr, and CMSIS-RTOS.
In embedded C, working with an RTOS involves:
- Writing modular tasks as functions with well-defined entry points and stack requirements.
- Configuring task priorities and scheduling policies to meet real-time constraints.
- Using RTOS APIs to manage delays, handle events, and synchronize access to shared resources.
- Leveraging RTOS hooks for idle processing, memory management, and debugging support.
Adopting RTOS concepts elevates your embedded C development by enabling more organized, scalable, and maintainable software architectures—perfect for multitasking applications such as robotics control, sensor fusion, and communication stacks commonly found in advanced Raspberry Pi and microcontroller projects.
By deepening your understanding of I2C, SPI, UART communication protocols, and embracing RTOS basics, you greatly expand the functional capabilities of your embedded C projects. These advanced skills equip you to build sophisticated, responsive, and interconnected embedded systems, paving the way for cutting-edge innovations and professional-grade microcontroller solutions.
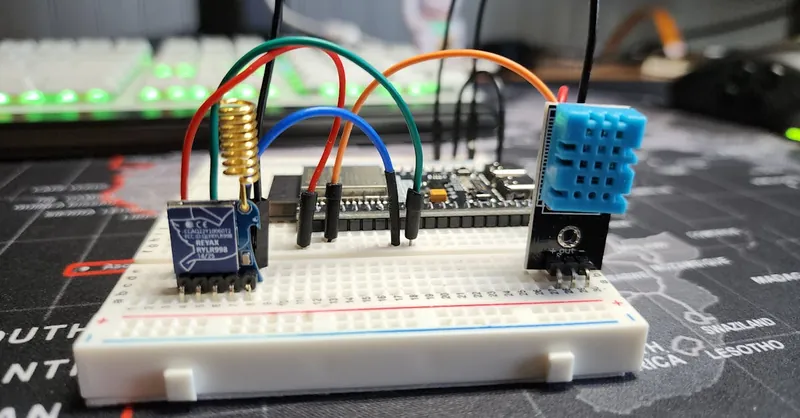
Image courtesy of Bmonster Lab