How to Program Microcontrollers in C++: A Complete Guide
Category: Embedded Systems
Mastering Microcontroller Programming with C++
If you're a tech enthusiast, hobbyist, or embedded systems developer eager to harness the power of microcontrollers using C++, you've landed in the right place. Programming microcontrollers can often feel daunting—from setting up your development environment to managing hardware resources efficiently. Whether you're transitioning from Python or starting fresh with C++, understanding the nuances of embedded C++ programming is key to unlocking advanced project capabilities. This guide comprehensively addresses all crucial aspects of microcontroller programming in C++, from the fundamentals of embedded systems and toolchain setup to advanced techniques like interrupt handling and memory management. Unlike generic overviews, this post digs deep into practical insights tailored for Raspberry Pi aficionados and microcontroller project builders, ensuring you can confidently write efficient, maintainable code. Ready to demystify microcontroller C++ programming and elevate your projects? Keep reading to get hands-on, step-by-step guidance that aligns perfectly with your embedded systems ambitions.
- Mastering Microcontroller Programming with C++
- Understanding Microcontrollers and Embedded Systems
- Setting Up Your Development Environment for Microcontroller C++ Programming
- C++ Basics for Embedded Programming
- Writing Your First Embedded C++ Program
- Managing Hardware with C++: Interacting with Microcontroller Peripherals
- Interrupts and Real-Time Event Handling in Embedded C++
- Memory Optimization and Resource Management in Embedded C++
- Debugging and Testing Embedded C++ Code
- Advanced Topics: Object-Oriented Design Patterns in Embedded C++
- Deploying and Updating Firmware: Best Practices for Flashing and Firmware Updates
Understanding Microcontrollers and Embedded Systems
To effectively program microcontrollers in C++, it's essential to first understand what microcontrollers are and how they fit within the broader landscape of embedded systems. A microcontroller is a compact integrated circuit designed to govern specific operations in embedded applications. Unlike general-purpose CPUs, microcontrollers combine a processor core, memory (RAM and flash), and peripherals such as timers, ADCs (Analog to Digital Converters), and serial communication interfaces—all on a single chip. This architecture allows microcontrollers to perform dedicated tasks efficiently with low power consumption, making them ideal for everything from simple sensor data collection to complex robotic control.
The typical microcontroller architecture includes:
- Central Processing Unit (CPU) – Executes instructions and handles data processing.
- Memory – Divided into program memory (Flash), data memory (RAM), and often non-volatile memory (EEPROM).
- Input/Output Ports – Interfaces with sensors, actuators, and communication devices.
- Timers and Counters – Manage time-dependent functions.
- Communication Interfaces – UART, SPI, I2C, etc., for external device connectivity.
Understanding this hardware foundation reveals why C++ is particularly well-suited for embedded programming. Compared to C, C++ offers powerful abstraction capabilities such as classes and templates, which enable writing modular, reusable, and maintainable code without sacrificing performance. Moreover, C++ supports strongly typed programming and inline functions, which help reduce bugs and optimize hardware interaction. In resource-constrained environments like microcontrollers, C++ allows you to write efficient, low-level code while benefiting from features such as constructors/destructors, operator overloading, and encapsulation to better organize complex embedded projects.
By mastering microcontroller architecture and leveraging C++’s flexibility and efficiency, you unlock the ability to build sophisticated embedded applications that are both robust and scalable—exactly what modern Raspberry Pi and microcontroller developers need to advance their projects.
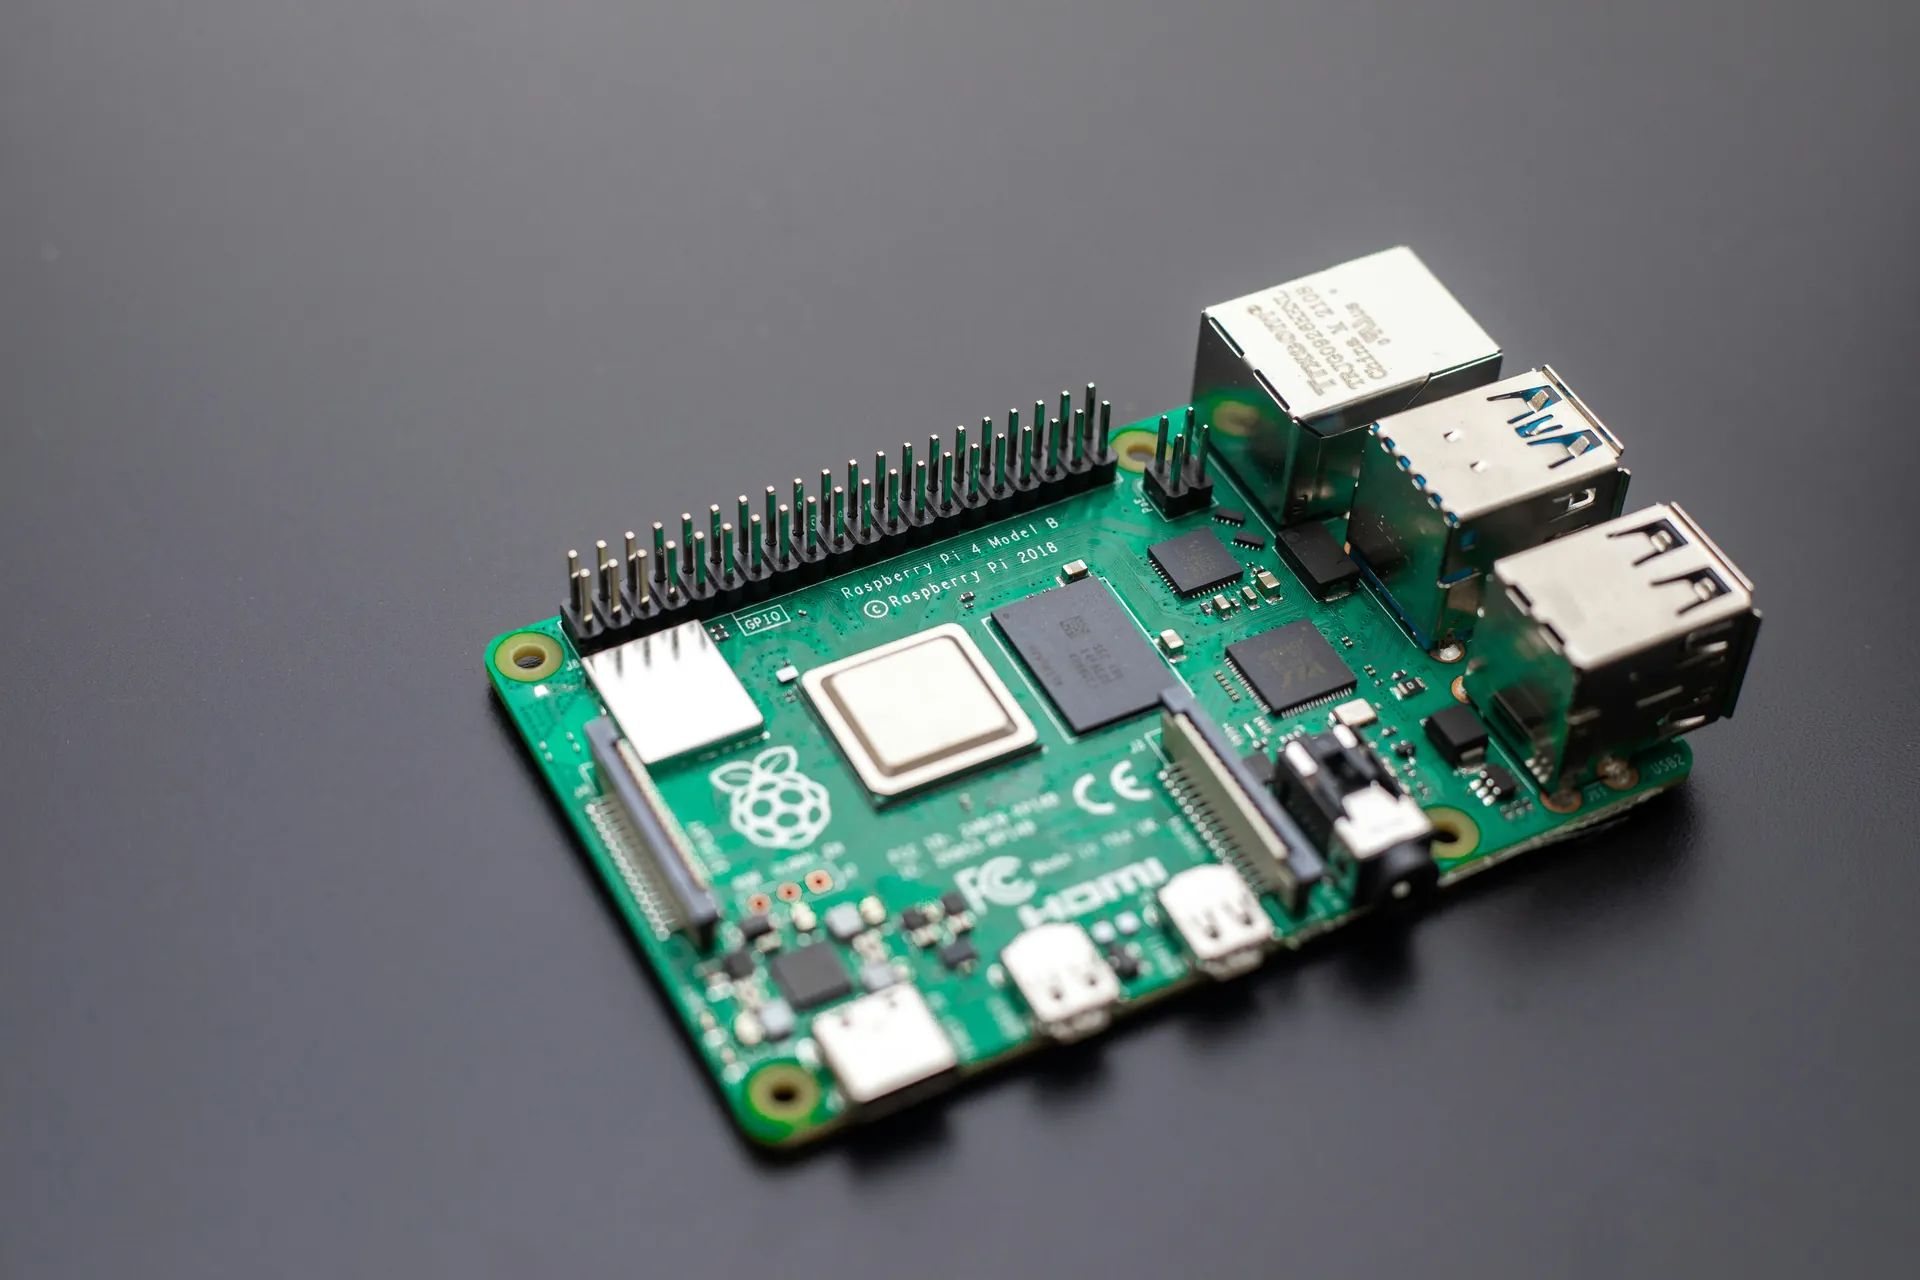
Image courtesy of cyber2120
Setting Up Your Development Environment for Microcontroller C++ Programming
Getting started with programming microcontrollers in C++ requires a well-configured development environment tailored to your target hardware. Setting up this environment correctly ensures smooth code compilation, debugging, and flashing onto your device, which is crucial for efficient embedded systems development. Here's an essential guide to installing and configuring the key components: IDEs, compilers, and toolchains, especially focused on popular microcontrollers like ARM Cortex-M, AVR, and ESP32.
Choosing and Installing an IDE
An Integrated Development Environment (IDE) streamlines the coding workflow by combining code editing, compiling, debugging, and project management into a single interface. For microcontroller C++ development, some widely-used IDEs include:
- Visual Studio Code (VS Code) – A lightweight, highly customizable editor with extensions such as the Cortex-Debug and PlatformIO plugins, making it popular for diverse embedded projects.
- Eclipse IDE for Embedded C/C++ (Eclipse CDT) – A free, open-source option offering extensive debugging and code analysis features.
- PlatformIO IDE – Built on top of VS Code, PlatformIO supports many microcontroller boards and integrates multiple toolchains and libraries.
- Atmel Studio – Targeted specifically at AVR and SAM microcontrollers, ideal for projects based on Atmel chips.
- STM32CubeIDE – Official IDE for STM32 ARM Cortex-M microcontrollers, integrated with hardware configuration tools and debugging support.
Selecting the right IDE depends on your microcontroller platform and personal preference, but all offer the essential features needed for effective embedded C++ programming.
Installing Compilers and Toolchains
Compilers and toolchains translate your C++ source code into machine code that microcontrollers can execute. The GNU Compiler Collection (GCC) is the industry-standard, free, and open-source compiler suite, with specialized versions for embedded development:
- GCC for ARM Embedded (arm-none-eabi-gcc) is the de facto compiler for ARM Cortex-M microcontrollers, supporting C++ with full optimization for size and speed.
- AVR-GCC – Tailored for Atmel AVR microcontrollers like the popular ATmega328 used in Arduino boards.
- Xtensa GCC – For ESP32 and ESP8266 microcontrollers, supporting the specialized Espressif architecture.
When installing these toolchains, ensure that the appropriate environment variables (such as PATH) are configured, so your IDE can locate the compilers and associated utilities (linker, debugger, object format tools). Many toolchains also come bundled with essential command-line utilities like make for automated builds.
Integrating Hardware-Specific Toolchains and SDKs
For advanced embedded projects, it’s critical to include microcontroller vendor-provided Software Development Kits (SDKs) and toolchains customized to the hardware:
- STM32CubeMX and STM32CubeIDE provide graphical configuration tools and HAL libraries simplfying peripheral initialization for STM32 MCUs.
- Espressif IDF (IoT Development Framework) is the official SDK for ESP32, offering FreeRTOS integration, Wi-Fi, and Bluetooth stack support.
- Atmel ASF (Atmel Software Framework) bundles drivers and middleware for AVR and SAM microcontrollers.
Integrating these SDKs into your IDE and build system allows seamless access to peripheral drivers, middleware, and examples, vastly accelerating development.
By meticulously setting up your development environment—including a capable IDE, the correct compiler toolchain, and hardware-specific SDKs—you lay a strong foundation for productive microcontroller programming in C++. This preparation ensures your code compiles efficiently, bugs can be diagnosed quickly, and deployment to embedded hardware is hassle-free, empowering you to focus on innovation in your Raspberry Pi and microcontroller projects.

Image courtesy of luis gomes
C++ Basics for Embedded Programming
When programming microcontrollers in C++, mastering the core language concepts tailored for embedded systems is crucial. Unlike desktop applications, embedded programming demands careful control over memory and hardware resources, so understanding fundamental C++ features—data types, pointers, classes, and memory management—enables you to write efficient, reliable code optimized for microcontroller constraints.
Key Data Types in Embedded C++
Microcontrollers typically use fixed-width integer types to ensure portability and predictability:
- Standard integer types:
int,unsigned int,long, andshort. However, their size can vary between platforms. - Fixed-width types from
<cstdint>such asuint8_t,int16_t, anduint32_tguarantee exact bit sizes, which is essential for interfacing with hardware registers and communication protocols. - Floating-point types (
floatanddouble) may be supported, but many microcontrollers lack hardware FPU (Floating Point Unit), making usage costly in execution time and memory.
Choosing the right data type affects both performance and memory footprint, so prefer fixed-width integers and avoid unnecessary floating-point operations unless absolutely needed.
Understanding and Using Pointers Effectively
Pointers are fundamental in embedded C++ for direct hardware access and efficient memory manipulation:
- Pointers store memory addresses, allowing you to access hardware registers mapped in memory or manipulate buffers directly.
- Using
volatilepointers is vital when dealing with memory-mapped peripherals to prevent compiler optimizations that could skip necessary hardware reads or writes. - Pointer arithmetic enables traversing arrays or buffer regions precisely, a common requirement for communication protocols like SPI or I2C.
Mastering pointers means you can control hardware registers, manage dynamic buffers, and write low-level drivers—all indispensable in embedded programming.
Leveraging Classes for Embedded Software Structure
While C++ classes might seem heavy for microcontroller programming, they provide valuable encapsulation and modularity:
- Use classes to abstract hardware peripherals, encapsulating initialization, configuration, and operation inside well-defined interfaces.
- Inline member functions and careful design ensure zero-overhead abstractions; the compiler optimizes class methods as effectively as procedural code.
- Classes support constructors and destructors, allowing clean resource management like enabling/disabling peripherals or managing interrupts within object lifecycles.
In embedded projects, object-oriented principles help organize complex firmware into reusable components, improving readability and maintainability without compromising performance.
Efficient Memory Management in Resource-Constrained Environments
Microcontrollers have limited RAM and flash memory, so dynamic memory usage requires prudence:
- Avoid or minimize using dynamic allocation (
newanddelete) in embedded systems to prevent fragmentation and runtime overhead. - Prefer static or stack allocation, which is deterministic and efficient.
- Use placement new or custom memory pools if dynamic behavior is indispensable, ensuring tight control over memory layout.
- Employ const qualifiers and
constexprto place data and code in flash memory instead of RAM, preserving precious volatile memory.
Understanding C++ memory management in embedded contexts ensures your firmware remains robust, fast, and stable, crucial when working with microcontrollers that have strict resource limitations.
By mastering these essential C++ concepts—careful selection of data types, judicious pointer usage, thoughtful class design, and mindful memory management—you establish a solid foundation for crafting high-performance, maintainable embedded software for microcontroller platforms like ARM Cortex-M, AVR, and ESP32. This knowledge empowers you to unlock the full potential of your embedded projects, delivering responsive and reliable applications on resource-constrained hardware.

Image courtesy of cottonbro studio
Writing Your First Embedded C++ Program
Getting hands-on with embedded C++ programming starts best with a simple yet practical project that demonstrates how software interacts directly with hardware. One of the most classic and effective beginner exercises is blinking an LED, which familiarizes you with GPIO (General-Purpose Input/Output) pin control, timing, and fundamental C++ syntax for microcontrollers. Alternatively, reading data from a basic sensor—such as a temperature or light sensor—introduces ADC (Analog-to-Digital Converter) usage and simple data processing. Both projects provide invaluable insights into embedded programming workflows.
Step-by-Step: Blinking an LED
- Setup your hardware: Connect an LED to a microcontroller GPIO pin, often with a resistor in series to limit current.
- Include necessary headers and define the pin: Use your microcontroller’s SDK or hardware abstraction library to configure the GPIO pin as an output.
- Initialize the pin mode: Inside your
main()function or setup routine, configure the pin direction using your board’s HAL (Hardware Abstraction Layer) or register-level programming. - Create a loop to toggle the LED: Implement an infinite loop that sets the pin HIGH (turns LED on), waits for a delay, sets it LOW (LED off), and waits again.
- Implement delay correctly: Use hardware timers or simple busy-wait loops if no RTOS is present, ensuring the delay is precise enough to visually perceive LED blinking.
Here’s a minimal C++ example for an ARM Cortex-M microcontroller using direct register manipulation to blink an LED on pin PA5:
#include <cstdint>

#define GPIOA_BASE 0x40020000
#define GPIOA_MODER (*(volatile uint32_t*)(GPIOA_BASE + 0x00))
#define GPIOA_ODR   (*(volatile uint32_t*)(GPIOA_BASE + 0x14))

constexpr uint32_t PIN5 = 1 << 5;

void delay(volatile uint32_t count) {
    while(count--) {
        __asm__("nop");
    }
}

int main() {
    // Set PA5 as output (MODER5[1:0] = 01)
    GPIOA_MODER &= ~(0x3 << (5 * 2)); // Clear bits
    GPIOA_MODER |=  (0x1 << (5 * 2)); // Set output mode

    while (true) {
        GPIOA_ODR |= PIN5;   // LED ON
        delay(1000000);
        GPIOA_ODR &= ~PIN5;  // LED OFF
        delay(1000000);
    }
}
Adapting to Sensor Reading
To read from a sensor, such as a potentiometer connected to an ADC pin:
- Configure the ADC peripheral to sample the analog input channel.
- Start ADC conversion and wait until the conversion completes.
- Read the digital value, typically from a data register.
- Optionally, process or log the sensor data within your embedded application.
This task highlights embedded interrupt handling, peripheral configuration, and the importance of efficient polling or event-driven programming in C++.
By writing your first embedded program—whether blinking an LED or sampling a sensor—you take a critical step from theory into practice. This foundational example teaches how to apply C++ for hardware control, utilize microcontroller registers or vendor SDKs, and implement timing—all core to building more complex, responsive embedded systems on platforms like Raspberry Pi and microcontrollers. With each small project, your confidence and understanding of embedded C++ programming will grow exponentially.
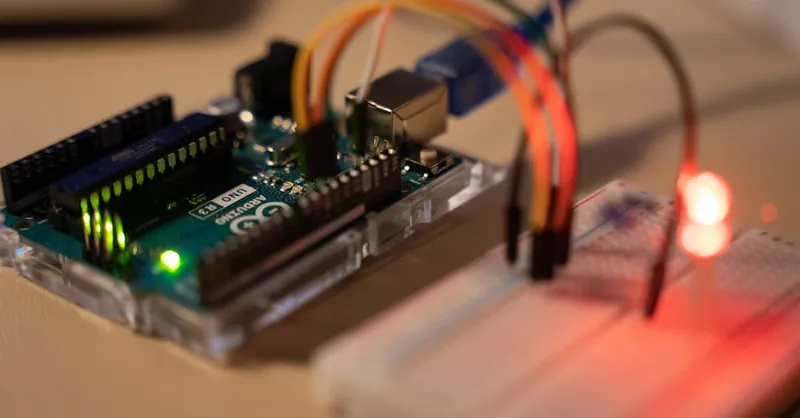
Image courtesy of Chengxin Zhao
Managing Hardware with C++: Interacting with Microcontroller Peripherals
Programming microcontrollers in C++ involves directly managing hardware peripherals such as GPIO pins, timers, ADCs (Analog-to-Digital Converters), and UART interfaces to interface with the physical world. Effective interaction with these peripherals can be achieved through two main approaches: high-level C++ abstractions using classes and hardware abstraction layers (HALs), and low-level direct register access for precise, performance-critical control.
Using C++ Abstractions for Peripheral Control
C++ excels at providing encapsulation and modularity by abstracting peripherals as objects. For example, you can define a GPIO class that encapsulates pin configuration, reading, and writing operations:
class GPIO {
    volatile uint32_t* moder;
    volatile uint32_t* odr;
    uint8_t pin;

public:
    GPIO(uint32_t base_addr, uint8_t pin_num) :
        moder(reinterpret_cast<volatile uint32_t*>(base_addr)),
        odr(reinterpret_cast<volatile uint32_t*>(base_addr + 0x14)),
        pin(pin_num) {}

    void setOutput() {
        *moder &= ~(0x3 << (pin * 2)); // Clear mode bits
        *moder |=  (0x1 << (pin * 2)); // Set as output
    }

    void write(bool state) {
        if(state) {
            *odr |= (1 << pin);
        } else {
            *odr &= ~(1 << pin);
        }
    }
};
This class-based approach improves code readability, maintainability, and reuse, especially for projects managing multiple peripherals. Many microcontroller vendors provide HAL libraries that offer similar C++-friendly APIs to simplify peripheral management without sacrificing performance.
Direct Register Access for Fine-Grained Control
While abstraction layers promote cleaner code, embedded developers often need direct access to CPU registers to configure peripherals with exact timing or when minimizing overhead is critical. This is done by using volatile pointers to the microcontroller’s memory-mapped peripheral registers:
- GPIO control involves setting port modes, output states, and reading input states via specific registers.
- Timers are configured by writing to control, prescaler, and auto-reload registers to create precise delays or PWM signals.
- ADC peripherals require enabling the ADC module, starting conversions, and reading results from data registers.
- UART interfaces use transmit and receive data registers, along with status flags, to implement serial communication.
For example, toggling an LED by writing directly to a register might look like this:
constexpr uint32_t GPIOA_ODR = 0x40020014;
volatile uint32_t* gpioa_odr = reinterpret_cast<uint32_t*>(GPIOA_ODR);

*gpioa_odr |= (1 << 5);  // Turn LED on
*gpioa_odr &= ~(1 << 5); // Turn LED off
Key Best Practices for Hardware Management in C++
- Use the
volatilekeyword when declaring pointers to peripheral registers to prevent the compiler from optimizing out necessary hardware reads or writes. - Prefer
constexprandconstexpressions for register addresses and bit masks to enable compile-time optimizations. - Encapsulate peripheral access in classes or namespaces to isolate hardware-specific code and improve modularity.
- Leverage hardware abstraction libraries or vendor SDKs when available to accelerate development and reduce boilerplate.
- Carefully manage interrupt-enabled peripherals to avoid race conditions, using atomic or critical sections where necessary.
By mastering these C++ techniques to interact with microcontroller peripherals—balancing elegant abstractions and low-level hardware control—you can build embedded firmware that is both efficient and maintainable. This proficiency is essential for complex Raspberry Pi and microcontroller projects needing reliable hardware communication, precise timing, and real-time responsiveness.

Image courtesy of Thirdman
Interrupts and Real-Time Event Handling in Embedded C++
In embedded systems, interrupts are indispensable for creating responsive, real-time applications on microcontrollers. Unlike polling, where the CPU continuously checks peripheral status, interrupts allow your program to react promptly to hardware events by temporarily halting normal execution and running a dedicated function called an Interrupt Service Routine (ISR). Implementing ISRs efficiently in C++ is key to achieving low-latency event handling, conserving power, and enabling concurrent operation of multiple time-critical tasks.
How to Implement Interrupt Service Routines (ISRs) in C++
In C++, ISRs are typically declared with specific compiler or microcontroller vendor attributes to designate them as interrupt handlers. The steps to implement an ISR include:
- Define the ISR function using the correct syntax and attributes for your toolchain (e.g.,
__attribute__((interrupt))in GCC for ARM Cortex-M). - Keep the ISR concise and fast—avoid heavy computations, dynamic memory allocations, or lengthy blocking calls within the ISR.
- Use
volatilevariables or atomic types for data shared between the ISR and main program to prevent compiler optimizations from causing data corruption. - Clear interrupt flags explicitly inside the ISR to prevent repeated triggers.
- Configure and enable the relevant interrupt sources in your microcontroller’s interrupt controller (such as NVIC for ARM Cortex-M).
Here’s a basic example demonstrating an ISR for a timer interrupt on an ARM Cortex-M microcontroller:
#include <cstdint>

volatile bool timerFlag = false;

extern "C" void TIM2_IRQHandler() {  // ISR must use C linkage
    // Clear timer interrupt flag
    TIM2->SR &= ~TIM_SR_UIF;

    // Set a flag indicating timer event occurred
    timerFlag = true;
}
Best Practices for Responsive Embedded Applications
To ensure your embedded application remains responsive and stable when handling real-time events via interrupts, consider these best practices:
- Minimize ISR execution time: Delegate complex processing to the main loop or lower-priority task by setting flags or buffers in the ISR.
- Use hardware debounce circuits or software filtering for interrupts generated by noisy inputs like mechanical buttons.
- Carefully manage shared resources between ISRs and the main context using critical sections or atomic operations to avoid race conditions.
- Prioritize interrupts where supported, assigning higher priority to critical events to reduce latency.
- Leverage interrupt nesting and tail-chaining features of modern microcontrollers for efficient interrupt servicing.
- Disable interrupts only when absolutely necessary, and for the shortest duration possible, to maintain system responsiveness.
Embracing interrupts and real-time event handling in your C++ embedded code empowers you to build highly responsive applications—like sensor data acquisition, communication protocol handling, or motor control—that react immediately to external stimuli. Proper ISR design and interrupt management are foundational skills for advanced Raspberry Pi and microcontroller projects demanding precise timing and concurrent operation.

Image courtesy of Craig Dennis
Memory Optimization and Resource Management in Embedded C++
Efficient memory optimization and resource management are critical when programming microcontrollers in C++, as these devices usually offer limited RAM and flash storage. To maximize the performance and stability of embedded applications, developers need to adopt strategies that minimize memory footprint and avoid common pitfalls related to dynamic memory usage.
Techniques to Minimize RAM and Flash Usage
-
Use
constandconstexprWherever Possible
Declaring variables and data structures asconstor compile-time constants withconstexprinforms the compiler that these values will not change, allowing them to be stored in flash memory instead of RAM. This helps preserve precious volatile memory for runtime variables. For example:cpp constexpr uint8_t ledPin = 13; const char welcomeMessage[] PROGMEM = "Welcome to Embedded C++!";Many microcontroller toolchains support placing constant strings and lookup tables in program memory using attributes likePROGMEM(AVR) or linker scripts (ARM). -
Avoid or Restrict Dynamic Memory Allocation (
newanddelete)
Dynamic memory allocation can lead to heap fragmentation, unpredictable latency, and potential memory exhaustion in embedded systems. Instead: - Prefer static allocation for global variables and buffers when possible.
- Use stack allocation within functions for short-lived temporary data, as stack is automatically freed.
-
If dynamic allocation is unavoidable, consider implementing custom memory pools or fixed-size block allocators that reduce fragmentation and improve determinism.
-
Leverage Scoped and Lightweight Objects
Use C++ features such as RAII (Resource Acquisition Is Initialization) to manage peripheral handles or resource locking via local objects that clean up automatically when going out of scope—minimizing memory leaks or dangling resources without heavy runtime overhead. -
Optimize Data Structures and Types
Select the smallest sufficient data types (e.g.,uint8_tinstead ofint) and use bitfields or packed structures carefully to reduce RAM size. Avoid unnecessary padding by ordering members from largest to smallest data types. -
Minimize Code Size with Inline Functions and Templates
Inline small functions and use templates smartly to reduce function call overhead, enabling the compiler to optimize and potentially eliminate unused code paths entirely (-Osoptimization).
Careful Use of the const Qualifier
Proper application of the const qualifier not only enforces immutability and safer code but also provides crucial hints to the compiler for better placement of data in flash memory, reducing RAM consumption. For embedded systems, this means:
- Declaring global lookup tables, calibration data, and fixed configuration parameters as
const. - Passing pointers or references to
constdata when modification is not required. - Using
constmember functions in classes to ensure methods don’t alter object state unnecessarily, enabling more aggressive compiler optimizations.
By systematically applying these memory optimization and resource management techniques, you ensure your C++ embedded applications run reliably within the tight constraints of microcontroller environments. This careful handling of memory and program resources is foundational for creating scalable, efficient firmware tailored for Raspberry Pi add-ons and diverse microcontroller projects.
Image courtesy of Athena Sandrini
Debugging and Testing Embedded C++ Code
Debugging and testing are critical phases in embedded C++ development, ensuring that your firmware behaves correctly on microcontroller hardware. Due to the complexity of embedded systems—interacting with hardware peripherals, constrained resources, and real-time requirements—traditional desktop debugging approaches often fall short. Effective debugging requires specialized tools and methods tailored for embedded environments, allowing developers to identify issues early, optimize performance, and ensure reliability.
Essential Methods for Debugging Embedded Firmware
- Using In-Circuit Debuggers (ICDs) and Debug Probes
In-circuit debuggers like J-Link, ST-Link, or OpenOCD-compatible hardware connect directly to your microcontroller’s debug interface (e.g., SWD or JTAG). These tools enable: - Step-by-step execution through your code to observe program flow.
- Breakpoints and watchpoints to halt execution when variables or registers reach specific states.
- Real-time variable inspection and modification during debugging sessions on actual hardware.
-
Peripheral register monitoring, which helps diagnose configuration errors or unexpected hardware behavior.
-
Simulators and Emulators
Simulators replicate microcontroller behavior on your development PC, enabling you to test embedded C++ logic without physical hardware. Although they cannot mimic all peripheral interactions perfectly, simulators are valuable for: - Verifying algorithm correctness and control flow.
- Early-stage development when hardware is unavailable.
-
Automated testing frameworks integration.
Common simulators include QEMU for ARM Cortex-M, while vendor-specific tools often provide emulation capabilities with peripheral models. -
Serial Logging and Debug Output
Integrating UART or USB serial communication into your firmware allows you to output debug logs, variable values, and program states dynamically. Serial debugging is often the simplest way to: - Trace program execution paths.
- Monitor sensor data or command responses in real-time.
-
Log error conditions or unexpected events without halting program flow.
Many developers implement lightweight logging classes with configurable verbosity levels to balance detail and resource usage. -
Unit Testing and Hardware-In-the-Loop (HIL) Testing
Writing unit tests for embedded C++ modules improves code correctness and maintainability. While testing hardware-dependent code requires mocks or simulators, frameworks like GoogleTest can be configured for embedded use. HIL testing goes further by running firmware with real peripherals or simulated inputs to validate system integration.
Best Practices for Debugging Embedded C++ Code
- Use volatile qualifiers and prevent compiler optimization issues in hardware register access, which can cause elusive bugs if overlooked.
- Enable compiler warnings and static analysis tools to catch potential issues early, such as uninitialized variables or type mismatches.
- Incrementally test your firmware, starting from low-level peripheral drivers up to integrated application logic, to isolate faults quickly.
- Maintain comprehensive documentation and comment your code extensively to simplify debugging, especially when working with low-level hardware interactions.
By combining these debugging tools and testing methodologies, embedded developers enhance code quality and project reliability. Mastering embedded debugging accelerates development cycles and reduces costly hardware troubleshooting, empowering you to deliver robust C++ microcontroller applications for your Raspberry Pi and embedded systems projects.

Image courtesy of ThisIsEngineering
Advanced Topics: Object-Oriented Design Patterns in Embedded C++
As your embedded C++ projects grow in complexity, applying Object-Oriented Programming (OOP) principles and design patterns becomes essential for enhancing code modularity, scalability, and maintainability. Unlike traditional procedural approaches, OOP allows you to structure firmware into reusable and loosely coupled components, making complex system management on microcontrollers much more manageable. Embedded C++ benefits greatly from design patterns tailored to resource-constrained environments, striking a balance between abstraction and efficient hardware control.
Why Use Design Patterns in Embedded Systems?
Design patterns are proven solutions to common software design problems. In embedded microcontroller projects, leveraging these patterns can help:
- Modularize hardware abstraction layers, allowing peripheral drivers to be easily swapped or extended without rewriting code.
- Isolate platform-specific implementations behind clean interfaces, facilitating portability across microcontroller families such as ARM Cortex-M, AVR, and ESP32.
- Manage system complexity by enforcing clear responsibilities and interactions between components.
- Promote maintainability and testability by reducing code duplication and fostering well-structured class hierarchies.
Key Object-Oriented Design Patterns for Embedded C++
Here are some of the most effective design patterns to apply in embedded C++ development for microcontrollers:
-
Singleton Pattern
Ensures a class has only one instance and provides a global point of access. This is highly useful for managing unique peripherals like UART controllers or system timers, guaranteeing consistent hardware state management without redundant instances. -
Strategy Pattern
Encapsulates algorithms or peripheral behaviors within interchangeable objects. For example, switching between different communication protocols (SPI, I2C, UART) at runtime without modifying client code improves flexibility and adaptability in multi-interface systems. -
Observer Pattern
Allows objects to subscribe to and receive notifications from hardware events or state changes, ideal for handling asynchronous peripheral signals or event-driven sensor data acquisition without tight coupling. -
Command Pattern
Encapsulates requests as objects, enabling queuing and deferred execution. This is particularly beneficial for task scheduling, command processing in embedded RTOS environments, or implementing software-controlled state machines supporting clear and testable commands. -
Facade Pattern
Provides a simplified interface to complex subsystems such as peripheral initialization, DMA management, or communication stacks. Facades significantly reduce client-side complexity and improve code readability.
Applying OOP Best Practices in Embedded C++
- Prefer composition over inheritance to minimize overhead and encourage flexible code reuse.
- Use interface classes (abstract base classes with pure virtual functions) to define contracts for hardware drivers, promoting platform-independent code.
- Keep classes lightweight and avoid unnecessary dynamic memory allocation; leverage stack or static instances to reduce runtime overhead.
- Use
constexprandinlinefunctions within class methods to enable compile-time optimizations crucial for resource-limited microcontrollers. - Apply RAII (Resource Acquisition Is Initialization) to manage hardware resources deterministically, ensuring peripherals are configured and released properly without leaks.
By integrating these object-oriented design patterns and principles into your embedded C++ projects, you achieve greater code robustness, modularity, and scalability, empowering you to build sophisticated microcontroller firmware that is easier to maintain and extend. This strategic use of OOP not only aligns with best industry practices but significantly elevates the quality of your Raspberry Pi and embedded systems developments.

Image courtesy of Google DeepMind
Deploying and Updating Firmware: Best Practices for Flashing and Firmware Updates
Successfully programming your microcontroller in C++ culminates with deploying and updating your firmware safely and efficiently. Whether you are flashing code for the first time or performing over-the-air (OTA) updates, applying best practices during the deployment process ensures reliability, prevents bricking devices, and enables seamless feature enhancements. Understanding bootloaders, flashing tools, and secure update mechanisms is essential for professional embedded development and maintaining robust Raspberry Pi and microcontroller projects.
Best Practices for Flashing Microcontroller Firmware
-
Use a Reliable Bootloader or Programming Interface
Most microcontrollers come with either a factory-installed bootloader or support community-developed bootloaders that facilitate firmware flashing via UART, USB, or SPI interfaces. Familiar bootloaders, such as the Arduino Optiboot, STM32 system bootloader, or Espressif’s built-in bootloader for ESP32, simplify deployment by handling basic communication and memory management during flashing. Using a bootloader reduces the risk of corrupting firmware and allows recovery options on failure. -
Select Proven Flashing Tools Compatible with Your MCU
Choose command-line utilities or IDE-integrated programmers with robust error handling and verification features. Examples include: - OpenOCD for ARM Cortex-M devices
- avrdude for AVR chips
- esptool.py for ESP32 series
These tools verify the flash write process and often support memory readback for validation, crucial to ensure firmware integrity.
-
Always Verify Firmware After Flashing
Performing a post-flash verification step compares the written memory against the intended binary, detecting incomplete or corrupted writes. Automated verification commands included in most flashing tools prevent deploying bricked or partially programmed devices. -
Backup Existing Firmware and Critical Data
Before flashing new firmware, consider backing up current flash contents if your setup permits, especially for devices in the field. This practice facilitates rollback to a known good state in case new firmware introduces bugs or incompatibilities.
Performing Firmware Updates Safely
Updating firmware on deployed devices requires careful planning and safeguards to avoid downtime or device failure:
-
Implement Dual-Bank or Dual-Partition Firmware Storage
Storing two firmware images on separate flash memory banks allows the device to boot from the backup image if the new firmware update fails. This mechanism provides robust fail-safe recovery and minimizes the risk of permanent device bricking. -
Use Secure Bootloaders with Integrity Checks
Employ cryptographic signature verification during boot or flashing to authenticate firmware. Secure bootloaders ensure that only trusted code runs on the microcontroller, preventing unauthorized or malicious firmware updates. -
Leverage Watchdog Timers During Updates
Integrate watchdog timers to reset the device if an update process hangs or corrupts execution, enabling an automatic system reboot and recovery pathway. -
Design Update Processes With Power-Failure Resilience
Writing firmware to flash is vulnerable to power interruptions. Implement incremental writes, transactional update protocols, or dedicated update flags to maintain atomicity and prevent incomplete firmware flashes. -
Consider Over-the-Air (OTA) Update Strategies
For network-connected microcontrollers like ESP32 or Raspberry Pi Pico W, OTA updates streamline firmware deployment without physical connections. Integrating OTA with secure transport layers (e.g., TLS) and robust versioning management maximizes update safety and end-user convenience.
By adhering to these best practices for flashing and firmware updates, embedded developers minimize risks, enhance device reliability, and streamline the deployment lifecycle of C++ microcontroller applications. Mastering these processes ensures that your Raspberry Pi and microcontroller projects remain flexible, secure, and maintainable throughout their operational life.

Image courtesy of cottonbro studio