Home Security System with Raspberry Pi and Sensors
Category: Embedded Systems
Secure Your Space: Build a Raspberry Pi Home Security System
If you're a tech enthusiast, hobbyist, or developer with a passion for Raspberry Pi and embedded systems, you know the thrill of creating innovative projects that blend software and hardware seamlessly. Perhaps you've been searching for a reliable, customizable home security solution that goes beyond off-the-shelf options. You want to leverage your skills in Python or C/C++ and microcontroller programming to build a system tailored to your needs—one that integrates various sensors and automations, keeping your home safe while pushing your development skills further.
Our detailed guide dives into the essentials and advanced techniques to set up a robust home security system powered by a Raspberry Pi and an array of sensors. Unlike typical tutorials, this post not only covers the hardware selection and sensor integration but also the programming logic, communication protocols, and practical deployment scenarios. We focus on solutions that cater to your expertise level, helping you avoid common pitfalls and unlocking the full potential of your Raspberry Pi-based security setup.
From sensor types to real-time alerts, and from automation scripts to system scalability, this article equips you with all you need to build a secure, smart environment with confidence. Continue reading to design a project that’s not only effective but also an excellent showcase of your embedded systems skills.
- Secure Your Space: Build a Raspberry Pi Home Security System
- Understanding the Basics: Why Raspberry Pi for Home Security?
- Choosing the Right Sensors for Your Home Security System
- Hardware Setup and Wiring: Integrating Sensors with Raspberry Pi
- Programming Your Security System: Python and C/C++ Approaches
- Implementing Real-Time Alerts and Notifications
- Data Logging and Monitoring: Building a User Interface
- Advanced Features: Facial Recognition and AI Integration
- Power Management and Reliability Considerations
- Ensuring Network Security and Privacy: Best Practices for Securing Communication Channels and Protecting User Data
- Scaling and Expanding Your Home Security System
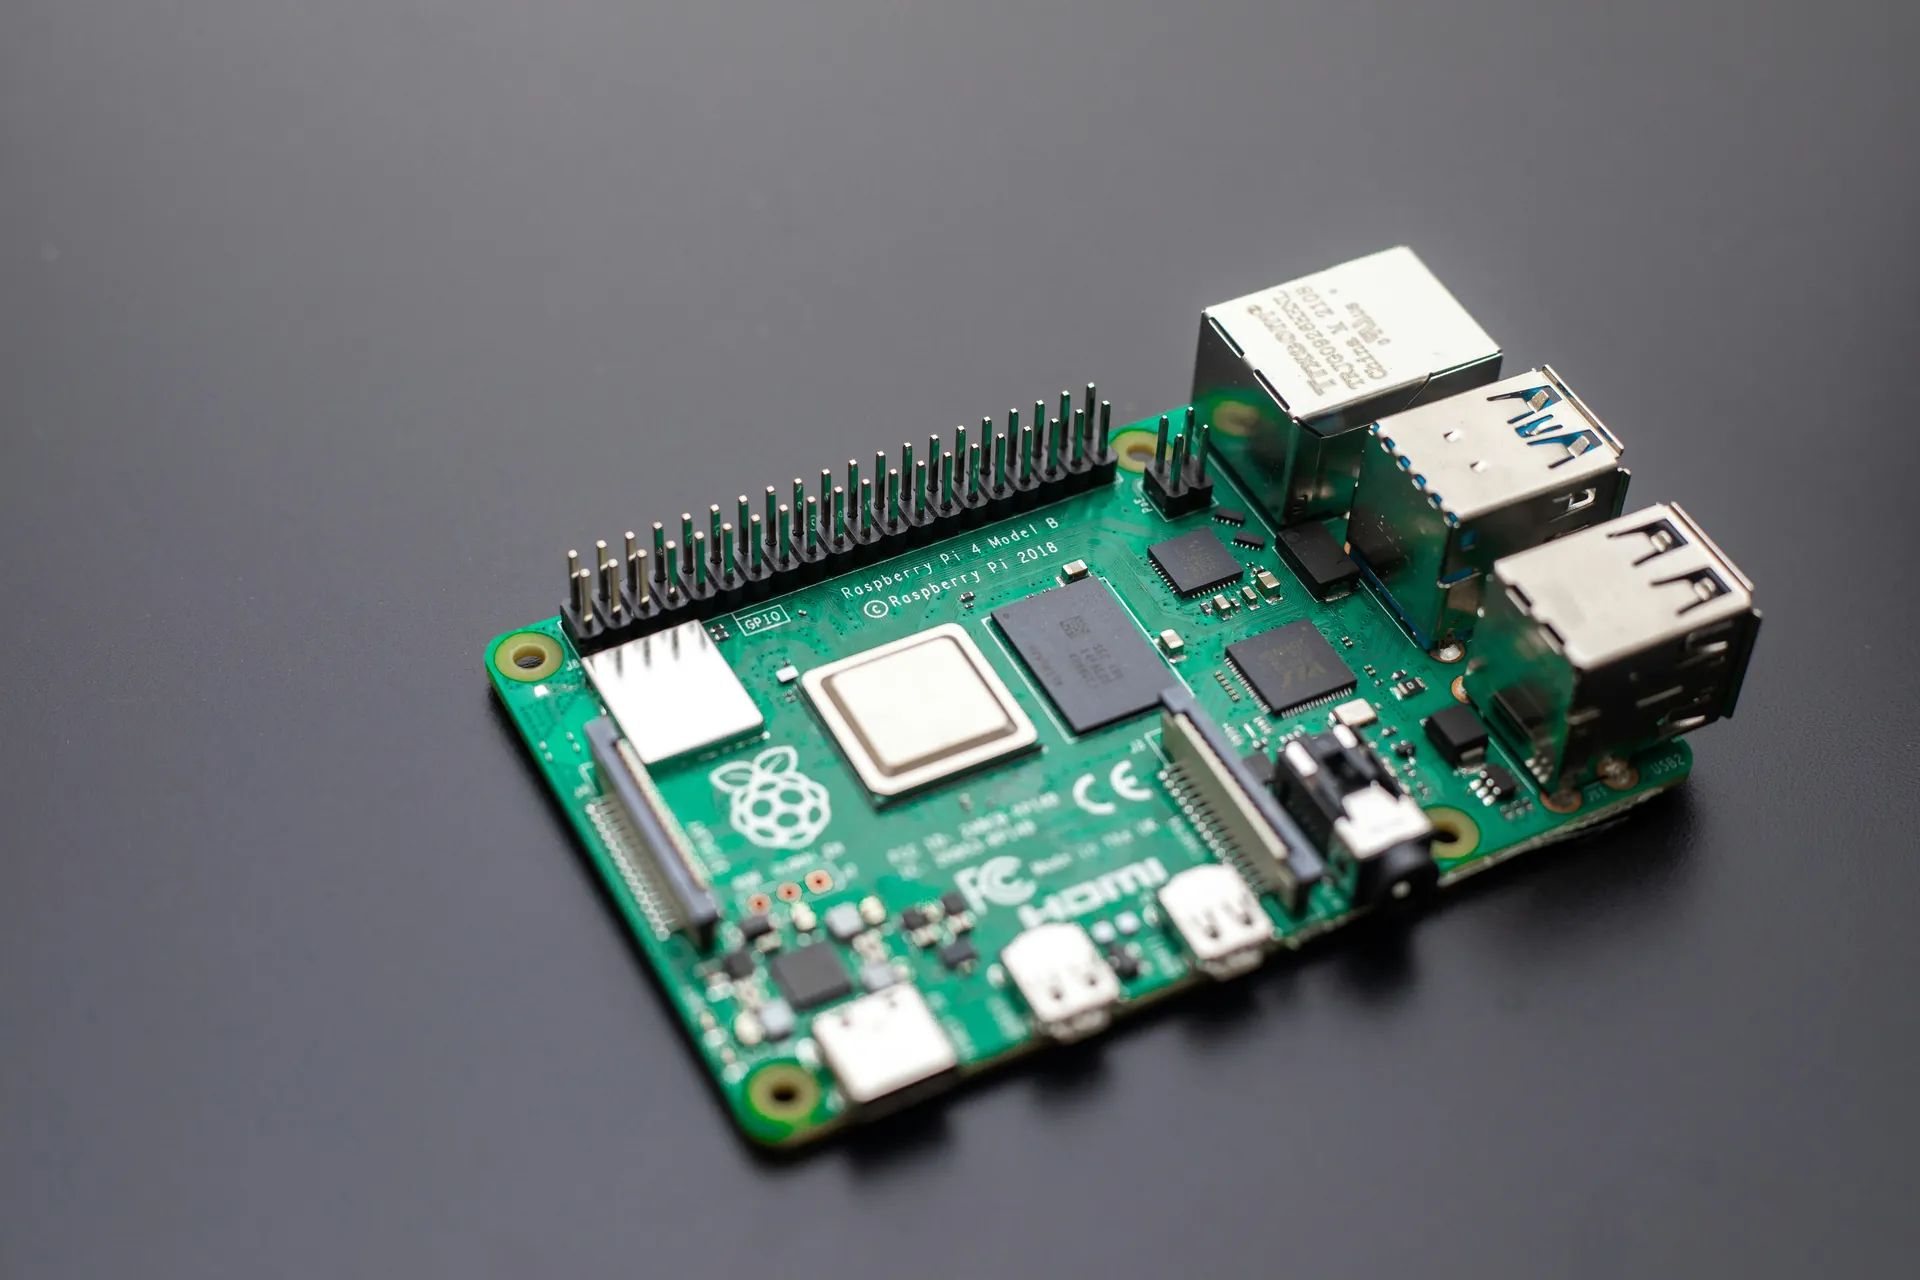
Understanding the Basics: Why Raspberry Pi for Home Security?
When building a home security system, choosing the right platform is crucial. The Raspberry Pi stands out as an exceptionally powerful and flexible choice compared to traditional microcontrollers like Arduino or ESP8266. Its capabilities extend well beyond simple sensor reading and actuation, making it ideal for complex, multi-sensor security setups that require heavy processing and network connectivity.
Key Advantages of Raspberry Pi for Security Projects
-
Processing Power and Memory
Unlike many microcontrollers, Raspberry Pi models come equipped with a multi-core processor and several hundred megabytes to gigabytes of RAM. This computational muscle enables running full-fledged operating systems such as Raspberry Pi OS, which supports multitasking, real-time video streaming, and sophisticated data processing—essential for handling video surveillance, motion detection algorithms, and AI-powered anomaly detection. -
Connectivity and Networking Options
Built-in Ethernet, Wi-Fi, and Bluetooth provide seamless integration into your home network and smart devices ecosystem. This extensive connectivity allows for real-time alerts, cloud data storage, remote monitoring, and smartphone notifications—features typically absent or limited in simpler microcontroller platforms. -
GPIO Flexibility and Sensor Compatibility
The Raspberry Pi’s 40-pin GPIO header supports a wide range of sensors including PIR motion detectors, magnetic door/window sensors, temperature and humidity sensors, and cameras. Its compatibility with communication protocols like I2C, SPI, and UART enables easy expansion and integration of diverse hardware components in one unified system. -
Software Ecosystem and Programming Support
Raspberry Pi’s native support for languages such as Python, C/C++, and scripting tools empowers developers to implement custom security logic, automate responses, and optimize system performance. Access to open-source libraries and community-driven projects accelerates development while allowing full control over the system architecture.
Overall System Flexibility
The Raspberry Pi acts not only as a sensor hub but also as a central processing unit capable of hosting web servers, databases, and AI frameworks. This flexibility lets you customize everything—from simple intrusion alerts to complex rule-based automations—without being locked into proprietary ecosystems. Whether you’re monitoring sensor data on a touch interface, sending instant alerts via SMS or email, or integrating voice control, Raspberry Pi delivers the versatility required for a truly personalized, scalable home security system.
In summary, Raspberry Pi’s rich feature set, connectivity options, and programming versatility make it the premier choice for building sophisticated, reliable, and adaptable home security solutions that empower hobbyists and professionals alike.

Image courtesy of Jakub Zerdzicki
Choosing the Right Sensors for Your Home Security System
Selecting the appropriate sensors is a critical step when building a Raspberry Pi home security system, as the effectiveness of your setup largely depends on accurate and timely detection of security threats. Different sensor types serve distinct purposes, and combining them strategically enhances both coverage and reliability. Below, we explore the most popular and functional sensor categories to consider for a comprehensive security solution:
PIR Motion Detectors
Passive Infrared (PIR) sensors detect heat emitted by living beings and are excellent for monitoring movement within a room or hallway. They are cost-effective, easy to interface with Raspberry Pi’s GPIO pins, and provide real-time alerts whenever motion is detected. PIR sensors are particularly useful for monitoring entry points and common areas while minimizing false alarms from pets or environmental changes.
Magnetic Door/Window Sensors
These sensors consist of two parts—a magnet and a reed switch—that trigger an alert when a door or window is opened. Magnetic sensors are fundamental for entry-point security, providing instant notifications of unauthorized access. Their simple binary output makes integration straightforward, allowing fast response actions such as activating alarms or sending notifications through your Raspberry Pi system.
Ultrasonic Sensors
Ultrasonic sensors measure distance by emitting sound waves and detecting their echo. While less common for traditional intrusion detection, they can add another layer of presence sensing by tracking movement or displacement in specific zones. Ultrasonic modules complement PIR sensors by reducing blind spots and enhancing accuracy for areas with irregular layouts.
Cameras and Video Sensors
Integrating camera modules with Raspberry Pi revolutionizes your security system by enabling video surveillance, motion-triggered recording, and remote monitoring via network streaming. Raspberry Pi supports various camera options, including the official Raspberry Pi Camera Module and USB webcams, which you can program with OpenCV or other libraries to add intelligent image processing capabilities like face recognition or object detection.
Environmental Sensors: Smoke, Gas, and More
For comprehensive home safety beyond intrusion detection, environmental sensors are indispensable. Smoke detectors and gas sensors can alert you to fire hazards, carbon monoxide leaks, or natural gas emissions. These sensors interface well with Raspberry Pi, providing vital data to trigger emergency protocols, send alerts to your smartphone, or initiate ventilation systems.
Sensor Selection Considerations
When choosing sensors for your Raspberry Pi home security project, keep these factors in mind:
1. Reliability and Accuracy: Opt for sensors with low false alarm rates and consistent performance in your environment.
2. Power Consumption: Some sensors may require constant power—consider your power setup, especially for battery-backed systems.
3. Communication Protocols: Ensure compatibility with Raspberry Pi GPIOs or support for protocols like I2C, SPI, or UART for easier integration.
4. Cost vs. Coverage: Balance your budget with the number of sensors and their placement to maximize security coverage.
By thoughtfully selecting and combining these sensor types, you create a robust, multi-layered home security system that leverages the Raspberry Pi’s versatility and processing power, delivering real-time protection and peace of mind.
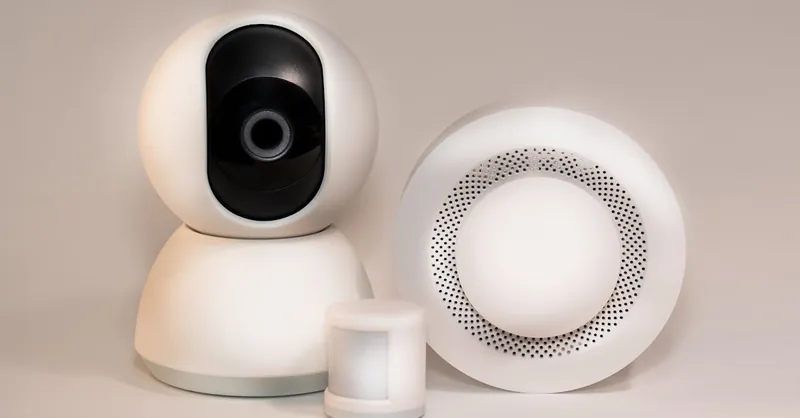
Image courtesy of Jakub Zerdzicki
Hardware Setup and Wiring: Integrating Sensors with Raspberry Pi
Achieving a reliable and responsive home security system requires meticulous hardware setup and wiring to ensure seamless communication between your Raspberry Pi and the various sensors. The Raspberry Pi’s GPIO (General Purpose Input/Output) pins serve as the backbone for connecting sensors, but proper wiring, power management, and signal conditioning are crucial to avoid issues such as noise, voltage mismatches, or faulty readings.
Step-by-Step Guide to Wiring Sensors to GPIO Pins
-
Identify Sensor Signal Types
Sensors typically produce either digital (binary) or analog signals. Since Raspberry Pi GPIO pins accept digital inputs only, analog sensors (e.g., certain gas or environmental sensors) require additional components like an Analog-to-Digital Converter (ADC), such as the MCP3008, to translate analog voltage signals into digital data readable by the Pi. -
Mapping Pins and Voltage Levels
Raspberry Pi GPIO pins operate at 3.3V logic level, which is critical to note since applying 5V signals directly can damage the board. Always verify each sensor’s operating voltage and logic levels. For sensors designed for 5V, use level shifters or voltage dividers to protect your Pi. -
Connecting Power Lines
Supply the appropriate power to each sensor using the Raspberry Pi’s 3.3V or 5V power pins depending on the sensor’s specifications. Avoid powering high-current sensors directly from the Pi; instead, consider using an external regulated power source or powered USB hub to maintain voltage stability and prevent brownouts. -
Implementing Signal Conditioning
Some sensors may require pull-up or pull-down resistors on their data lines to maintain stable logic states and minimize signal noise. For example, reed switches in magnetic door sensors typically benefit from pull-up resistors to ensure a clean binary signal. Additionally, placing small capacitors near sensor inputs can help smooth out transient voltage spikes and enhance signal integrity. -
Wiring for Communication Protocols
When integrating sensors using I2C, SPI, or UART protocols, ensure proper wiring of clock (SCL), data (SDA), chip select (CS), and ground lines. Keep wiring lengths short to reduce interference and always connect sensor grounds to the Raspberry Pi’s ground to maintain a common reference point.
Power Management Best Practices
Efficient power management protects your Raspberry Pi and sensors while maximizing system uptime:
- Use a Reliable Power Supply rated at least 2.5A for Raspberry Pi 3 or newer models, and up to 3A for Raspberry Pi 4, to accommodate additional sensors and peripherals without voltage drops.
- Isolate High-Power Modules like cameras or motorized actuators on separate power lines if they cause voltage fluctuations.
- Employ Capacitors and Voltage Regulators for stabilizing power delivery when necessary, especially in environments prone to electrical noise.
By following these wiring guidelines and power management strategies, you ensure that your sensor signals are accurately captured and processed by your Raspberry Pi. This solid hardware foundation is vital for creating a responsive and dependable home security system capable of real-time monitoring and alerting.

Image courtesy of Ludovic Delot
Programming Your Security System: Python and C/C++ Approaches
Once your Raspberry Pi hardware is set up and sensors are integrated, the next crucial step is programming the system to read sensor data, fuse multiple inputs intelligently, and trigger timely alerts. Leveraging the power of both Python and C/C++ offers flexible paradigms to implement these functionalities, each with unique advantages for embedded home security projects.
Reading Sensor Data: Python vs. C/C++
Python’s simplicity and extensive libraries make it ideal for rapid development and prototyping when reading digital sensor inputs or communicating over I2C/SPI interfaces. For example, using the widely adopted RPi.GPIO or gpiozero libraries, you can read a PIR motion sensor state in just a few lines:
import gpiozero

pir = gpiozero.MotionSensor(4)  # GPIO pin 4

def motion_detected():
    print("Motion detected!")

pir.when_motion = motion_detected

# Keep the program running
pause()
In contrast, C/C++ offers lower-level control and faster execution speed, which is crucial for time-critical tasks or systems requiring reduced latency and minimal overhead. Sensor data reading can be implemented by accessing GPIO registers directly or through wiringPi libraries, such as:
#include <wiringPi.h>
#include <stdio.h>

#define PIR_PIN 7  // WiringPi pin 7 corresponds to GPIO4

void setup() {
    wiringPiSetup();
    pinMode(PIR_PIN, INPUT);
}

int main() {
    setup();
    while(1) {
        if(digitalRead(PIR_PIN) == HIGH) {
            printf("Motion detected!\n");
        }
        delay(500);
    }
    return 0;
}
Implementing Sensor Fusion
Sensor fusion enhances your home security system by combining inputs from different detectors—such as motion sensors, magnetic door contacts, and cameras—to reduce false alarms and improve detection accuracy. Python’s high-level constructs and libraries like numpy and scipy simplify data aggregation and algorithmic logic:
- Combine multiple sensor states into a single event trigger.
- Implement threshold-based or weighted decision-making.
- Incorporate time-window analysis to correlate sensor events.
In C/C++, sensor fusion demands explicit data structures and state machines but yields more efficient runtime, suitable for embedded scenarios where resources or latency are constrained.
Triggering Alerts and Automation
Both Python and C/C++ allow integration with external communication tools to push immediate alerts via SMS, email, or mobile notifications. Python’s extensive support for network protocols (HTTP, MQTT) and libraries like smtplib or twilio makes setting up alert systems straightforward. Meanwhile, C/C++ programs can use socket programming or call external scripts to perform similar tasks while maintaining minimal runtime footprint.
Choosing the Right Approach
| Aspect | Python | C/C++ |
|---|---|---|
| Development Speed | Fast prototyping, easy syntax | More complex setup, verbose code |
| Performance | Sufficient for most applications | Optimal for real-time, low-latency |
| Library Support | Extensive sensor and network libs | Rich device control libraries |
| Scalability | Excellent for integrating AI/image processing | Ideal for performance-critical modules |
By combining Python’s ease of use with C/C++’s speed and control, you can architect a modular security system: rapid sensor data prototyping in Python alongside performance-critical alert processing in C/C++. This hybrid development approach empowers you to customize your Raspberry Pi home security system precisely to your embedded programming expertise and project requirements.

Image courtesy of Tima Miroshnichenko
Implementing Real-Time Alerts and Notifications
A critical feature of any home security system is its ability to send real-time alerts and notifications that enable immediate response to potential intrusions or hazards. With a Raspberry Pi at the core, you can leverage multiple communication techniques to push instant SMS, email, or push notifications whenever a sensor is triggered. This not only keeps you informed regardless of your location but also integrates your security system seamlessly into modern smart home workflows.
Techniques for Sending Real-Time Alerts
-
MQTT (Message Queuing Telemetry Transport)
MQTT is a lightweight, publish-subscribe messaging protocol designed for efficient communication between devices. Using MQTT brokers like Mosquitto, your Raspberry Pi can publish sensor events to specific topics, which can then be subscribed to by your smartphone app or cloud services. MQTT is ideal for real-time monitoring and integrates easily with IoT platforms such as Home Assistant or Node-RED, enabling customized notifications. -
Twilio SMS and Voice Alerts
Twilio's APIs allow your Raspberry Pi to programmatically send SMS or make automated phone calls as alerts. By integrating Twilio's Python or C/C++ SDKs, you can quickly set up notification workflows triggered by sensor detections. Key advantages include broad global support, reliability, and the ability to incorporate rich messaging formats—even programmable voice messages for urgent situations. -
Email Notifications via SMTP
Using standard SMTP protocols and libraries like Python'ssmtplib, your Raspberry Pi can send automated emails to inform you of security breaches or sensor alerts. Emails can include detailed descriptions, timestamps, and even attachments like images from connected cameras. This method is straightforward to implement and easily accessible via mobile or desktop mail clients. -
Webhooks and Push Notifications
Webhooks allow your Raspberry Pi to trigger HTTP POST requests to third-party services, such as IFTTT or Zapier, enabling advanced notification chains. Push notifications can then be delivered to mobile devices through apps like Pushover or Pushbullet, offering instant, actionable alerts. This approach supports complex automation, including triggering alarms or smart device responses remotely.
Best Practices for Immediate Response
- Ensure Low Latency Communication: Use protocols and services optimized for speed, minimizing delays between event detection and alert delivery.
- Implement Retry and Confirmation Logic: Account for network failures by retrying alert transmissions and confirming delivery status when supported by APIs.
- Secure Your Alert Channels: Protect sensitive security notifications by using encrypted communication (e.g., MQTT over TLS), API keys, and authentication to prevent spoofing or tampering.
- Customize Alert Content: Include relevant sensor details, timestamps, and actionable recommendations to facilitate rapid decision-making by the recipient.
By mastering the integration of these real-time alerting techniques with your Raspberry Pi home security system, you empower your setup to not only detect threats but also proactively notify you or emergency contacts. This elevates your project from a passive monitoring tool to an intelligent, responsive security solution—perfectly aligned with the flexibility and power of embedded systems development.
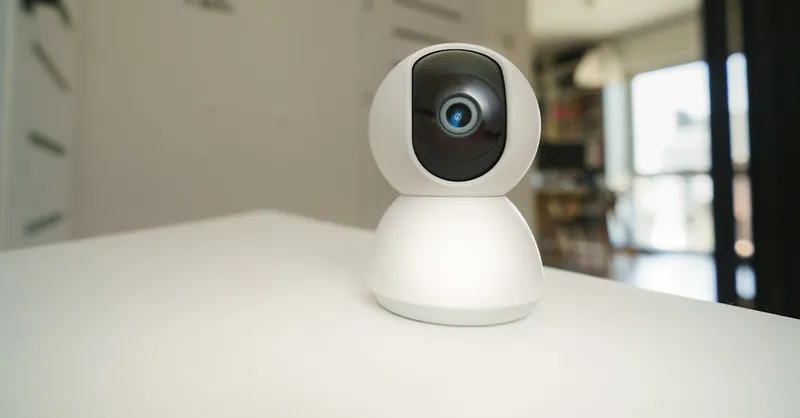
Image courtesy of Jakub Zerdzicki
Data Logging and Monitoring: Building a User Interface
A crucial aspect of any advanced Raspberry Pi home security system is effective data logging and real-time monitoring. Capturing sensor data locally or in the cloud not only helps in incident analysis and troubleshooting but also empowers you to visualize security trends and system health through custom dashboards. Developing a lightweight user interface with frameworks like Flask transforms your Raspberry Pi into a powerful web server, providing accessible, intuitive insights into your sensor network from any device.
Storing Sensor Data Locally or in the Cloud
Choosing where and how to store your sensor data depends on your system’s scale and accessibility needs:
-
Local Storage
For privacy-focused users or setups without consistent internet, storing sensor logs locally on your Raspberry Pi filesystem using lightweight databases like SQLite or simple CSV files is ideal. Local storage reduces latency and avoids dependency on external services. You can implement file rotation or archiving scripts to manage storage efficiently and keep historical event data available for review. -
Cloud Storage
Leveraging cloud databases such as Firebase, AWS DynamoDB, or Google Sheets API offers flexibility and remote accessibility. Cloud storage enables cross-device monitoring, data redundancy, and scalability for growing sensor networks. You can use MQTT or RESTful APIs to push sensor readings to the cloud securely. Integrating cloud logging also simplifies building remote alerting systems and historical data analysis.
Visualizing Data with Flask Dashboards
Developing a web-based dashboard fosters real-time system monitoring and interactive control over your home security sensors:
-
Flask Framework: Flask is a lightweight Python web framework that runs seamlessly on Raspberry Pi. It allows you to serve dynamic web pages displaying sensor statuses, historical logs, and system alerts with minimal overhead. Flask’s modular design and templating engine (Jinja2) simplify creating customizable interfaces tailored to your security setup.
-
Dashboard Features to Implement:
- Real-time Sensor Status: Use server-sent events (SSE) or AJAX polling to update sensor data dynamically without needing page refreshes.
- Historical Data Visualization: Integrate charting libraries like Chart.js or Plotly to plot temperature trends, motion detection frequency, or door/window open events over time.
- User Authentication: Secure access to your dashboard with Flask-login or OAuth to protect sensitive security information.
-
Control Interfaces: Implement toggles or buttons to arm/disarm sensors, reset alarms, or trigger manual alerts directly from the dashboard.
-
Lightweight Alternatives: If resource constraints or simplicity are priorities, consider micro web frameworks like Bottle or FastAPI combined with minimal frontend UI frameworks to reduce resource consumption while maintaining responsiveness.
By implementing structured data logging and an engaging monitoring dashboard, your Raspberry Pi home security system becomes not just a reactive tool but an intelligent and user-friendly platform. This enhances your ability to analyze security events, optimize sensor deployment, and maintain peace of mind through real-time insights—key elements that elevate your embedded systems project into a professional-grade, creative security solution.

Image courtesy of Atlantic Ambience
Advanced Features: Facial Recognition and AI Integration
To elevate your Raspberry Pi home security system beyond basic sensor detection, integrating facial recognition and artificial intelligence (AI) opens the door to intelligent automation and enhanced threat analysis. By harnessing the power of OpenCV and machine learning frameworks, you can implement sophisticated image processing capabilities that accurately identify known individuals, detect intruders, and intelligently respond to unusual activity patterns.
Introduction to OpenCV for Raspberry Pi Security
OpenCV (Open Source Computer Vision Library) is a versatile, open-source computer vision framework widely used in embedded systems projects. On the Raspberry Pi, OpenCV enables access to powerful algorithms for facial detection, recognition, motion tracking, and object classification—all crucial for next-level home security:
- Face Detection: Quickly pinpoint faces in a camera feed using pre-trained classifiers like Haar cascades or deep learning models such as Single Shot Multibox Detector (SSD).
- Face Recognition: Match detected faces against a database of known profiles using embeddings from models like FaceNet or Dlib, allowing your system to distinguish between residents and unknown visitors.
- Motion-Based Alerts: Combine video motion detection with sensor inputs to reduce false alarms and focus processing resources on relevant events.
OpenCV’s extensive Python bindings make it ideal for Raspberry Pi projects, facilitating seamless integration with existing sensor data acquisition and alert mechanisms.
Leveraging Machine Learning and AI
Incorporating machine learning (ML) into your Raspberry Pi home security system transforms raw sensor and video data into actionable intelligence. Beyond face recognition, AI can analyze behavior patterns and environmental cues:
- Anomaly Detection: Train models to recognize unusual motion patterns or unexpected activity times, improving accuracy in alert generation.
- Object Classification: Differentiate between humans, pets, or vehicles, enabling context-aware alerts and reducing nuisance notifications.
- Voice and Sound Recognition: Integrate audio sensors with ML to detect specific sounds such as glass breaking or alarms, expanding multi-modal security sensing.
Popular lightweight ML frameworks suitable for Raspberry Pi include TensorFlow Lite and PyTorch Mobile, optimized for embedded deployment with minimal compute and memory overhead.
Benefits of AI-Enhanced Security on Raspberry Pi
- Proactive Intrusion Detection: Facial recognition allows for automated unlocking for authorized users or immediate lockdown and alerting upon unauthorized access attempts.
- Reduced False Alarms: By fusing sensor data with video and AI interpretation, your system minimizes alerts triggered by harmless events like pets or shadows.
- Customizable Intelligence: Train your models with your own datasets and tune sensitivity to suit your home environment and security requirements.
- Scalable Architecture: Modular AI components let you expand functionality over time, enriching your Raspberry Pi security system with advanced analytics or integration with cloud-based AI services.
Integrating OpenCV and AI technologies transforms your Raspberry Pi from a simple sensor hub into an intelligent security sentinel. This advancement not only exemplifies expertise in embedded systems programming but also future-proofs your home safety by leveraging cutting-edge open-source tools tailored for creative Raspberry Pi projects.

Image courtesy of cottonbro studio
Power Management and Reliability Considerations
Ensuring your Raspberry Pi home security system remains operational during power outages or fluctuations is paramount for continuous protection and peace of mind. A sudden loss of power can not only disable your sensors and alert mechanisms but also corrupt data or cause hardware damage. Implementing robust power management strategies boosts system reliability and guarantees persistent home security coverage.
Uninterrupted Power Supply (UPS) Options for Raspberry Pi Security Systems
Selecting the right UPS (Uninterruptible Power Supply) solution tailored for Raspberry Pi projects can provide seamless power continuity. Consider these popular and effective options:
-
Dedicated Raspberry Pi UPS HATs
UPS HATs designed specifically for the Raspberry Pi stack directly onto the GPIO pins, supplying battery-backed power while charging simultaneously. Features typically include automatic safe shutdown scripting, input power monitoring, and RTC (real-time clock) modules for accurate timekeeping during outages. -
Power Banks with Pass-Through Charging
High-quality USB power banks supporting pass-through charging serve as economical battery backups. When mains power fails, the power bank instantly maintains supply without interruption, and it recharges automatically once power returns. -
Custom Battery Backup Circuits
For advanced embedded developers, designing dedicated DC-DC converters with lithium-ion or LiPo batteries combined with intelligent charge controllers offers the highest flexibility. Such setups can incorporate battery level monitoring, fail-safe shutdown routines, and scalable capacity tailored to system requirements.
Battery Backup and Safe Shutdown Practices
To prevent data corruption and extend hardware longevity during outages:
- Implement Graceful Shutdown Scripts: Use UPS monitoring tools or GPIO-triggered scripts on the Raspberry Pi to detect power loss and execute a controlled shutdown sequence, preserving file system integrity.
- Monitor Battery Levels Regularly: Integrate voltage monitoring sensors or software utilities to track backup battery health and alert users when replacement or charging is needed.
- Optimize Power Consumption: Disable non-essential peripherals, dim LEDs, or lower CPU frequency during battery mode to extend operational time when running on backup power.
Maintaining Continuous Operation
Apart from power redundancy, enhance system reliability by incorporating:
- Watchdog Timers: Hardware or software watchdogs automatically reset the Raspberry Pi in case of software glitches or freezes, ensuring the security system remains responsive.
- Redundant Communication Paths: Utilize multiple alert channels (e.g., Wi-Fi and GSM/LTE modems) to maintain notification capabilities even if one network fails.
- Robust Enclosures and Connections: Protect hardware connections and electronics from environmental factors like moisture, dust, and temperature extremes that can cause unexpected failures.
By prioritizing UPS integration, battery backup strategies, and proactive system safeguards, you ensure your Raspberry Pi-driven home security setup delivers consistent, uninterrupted monitoring with minimal downtime. These power management best practices are vital for any embedded systems developer aiming to build a trustworthy and long-lasting smart security solution.

Image courtesy of alex
Ensuring Network Security and Privacy: Best Practices for Securing Communication Channels and Protecting User Data
A robust home security system built on Raspberry Pi becomes truly effective only when its network security and privacy are uncompromisingly secured. Since your system continuously communicates sensor data, alerts, and video streams over your home network or the internet, it is critical to adopt best practices that safeguard these communication channels from unauthorized access, interception, and potential cyberattacks. Failing to protect these pathways could expose sensitive personal information or allow attackers to disable or manipulate your security devices.
Securing Remote Access with SSH
Secure Shell (SSH) is the primary method for remotely accessing the Raspberry Pi command line or transferring files securely. To harden SSH access:
- Disable Password Authentication: Use only SSH key-based authentication by generating cryptographic key pairs (
ssh-keygen) and deploying your public key onto the Raspberry Pi. This mitigates brute-force password attacks. - Change Default Ports: Modify the default SSH port (22) to a non-standard port to reduce automated scan attempts.
- Enable Fail2Ban or Similar Tools: Automatically ban IP addresses exhibiting suspicious login behaviors, effectively blocking repeated failed authentication attempts.
- Regularly Update Raspberry Pi OS and OpenSSH: Keep your system and SSH software patched to close security vulnerabilities promptly.
- Limit User Access: Create dedicated, unprivileged user accounts and avoid using the default “pi” user, which is commonly targeted by attackers.
Setting Up a VPN for Encrypted Communication
To ensure all remote communications are tightly secured, setting up a Virtual Private Network (VPN) on your Raspberry Pi or your home router is paramount. A VPN encrypts your traffic, preventing eavesdropping on Wi-Fi networks or over the internet:
- OpenVPN or WireGuard: Both are lightweight, open-source VPN solutions compatible with Raspberry Pi. WireGuard, in particular, offers streamlined configuration and superior performance on limited hardware.
- Access Local Network Resources Securely: VPN allows you to safely connect to your home security system’s web dashboard, MQTT broker, or video streams from anywhere without exposing these services publicly.
- Prevent Man-in-the-Middle Attacks: Strong encryption and authenticated tunnels thwart attackers who might try to intercept or modify your sensor data.
Implement VPN with strong, unique encryption keys and use two-factor authentication where possible for enhanced protection.
Protecting User Data and Communications
Home security systems handle sensitive data including sensor logs, video feeds, and user credentials. To preserve privacy and data integrity:
- Use Encrypted Protocols: When transmitting data, prefer secure protocols like HTTPS for web interfaces and MQTT over TLS for sensor messaging. Avoid unencrypted protocols such as HTTP or plain MQTT to prevent sniffing.
- Store Data Securely: Encrypt sensitive data at rest on your Raspberry Pi using filesystem encryption or application-level encryption to protect against unauthorized physical access.
- Implement Authentication and Authorization: Access to your security system’s dashboard, APIs, and alerting mechanisms should be protected by strong passwords, OAuth, or token-based authentication to prevent unauthorized control.
- Regularly Audit Logs: Maintain and review system logs for unusual access patterns or anomalies that might indicate security breaches or attempted intrusions.
Incorporating these network security best practices into your Raspberry Pi home security architecture not only fortifies your system against external threats but also ensures the privacy and integrity of your home's safety data. This creates a reliable, trustworthy embedded security platform that seamlessly blends hardware innovation with strong cybersecurity foundations.
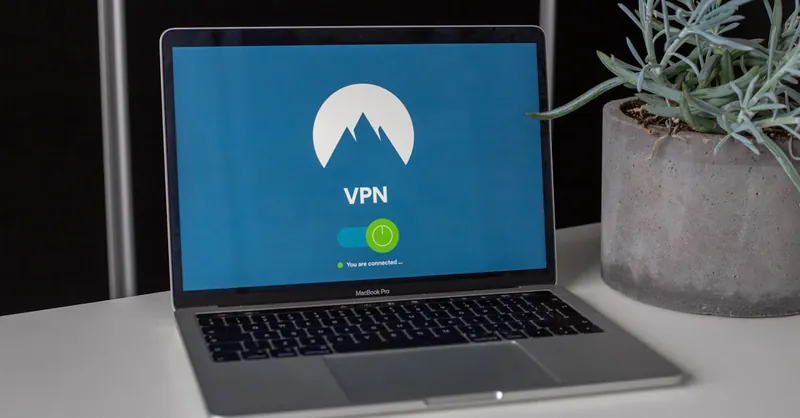
Image courtesy of Stefan Coders
Scaling and Expanding Your Home Security System
One of the standout advantages of building a Raspberry Pi home security system is its inherent modularity and scalability, allowing you to seamlessly expand your setup as security needs evolve. Employing modular design principles ensures that each component—whether it’s a sensor, camera, or software module—can be added, removed, or upgraded independently without disrupting the overall system. This flexibility not only future-proofs your investment but also empowers you to customize functionality precisely according to your home's layout and risk profile.
Modular Design Principles for Easy Expansion
To design a scalable system, adopt these key strategies:
- Decoupled Sensor Modules: Use standardized communication protocols like I2C, SPI, or MQTT for sensor data transmission. This enables adding new sensors without extensive rewiring or reprogramming.
- Configurable Software Architecture: Develop your control software with plugin-friendly modules or service-oriented components that detect and integrate new sensors automatically or with minimal configuration.
- Centralized Data Aggregation: Implement a centralized data bus or broker (for example, MQTT) on the Raspberry Pi that consolidates sensor information, simplifying expansion and sensor fusion as new devices join the network.
- Uniform Power and Grounding Schemes: Maintain consistent voltage levels and robust grounding to avoid electrical issues as your sensor count increases.
By embracing these principles, your Raspberry Pi security system evolves from a simple sensor cluster into a flexible, scalable security platform.
Integrating with Home Automation Platforms
Expanding beyond standalone security functionality, integrating your system with popular home automation platforms such as Home Assistant unlocks a new dimension of smart home control and automation. Home Assistant runs natively on Raspberry Pi and offers:
- Unified Device Management: Simplify monitoring and control of all sensors, cameras, and alarms from a single intuitive interface.
- Advanced Automation Rules: Create complex triggers combining sensor inputs with time schedules, presence detection, or external conditions to automate lighting, locks, or notifications.
- Cloud and Voice Assistant Integration: Seamlessly connect your security system with Amazon Alexa, Google Assistant, or cloud services for voice commands and remote control.
- Community-Driven Add-ons and Integrations: Leverage a vast ecosystem of pre-built integrations for new sensors, cameras, or communication services that reduce development time and increase reliability.
To connect your Raspberry Pi security sensors to Home Assistant, you can use MQTT or implement custom APIs, ensuring real-time data synchronization and remote management capabilities.
By scaling your Raspberry Pi home security system with modular hardware design and integrating it within powerful home automation platforms like Home Assistant, you create a highly customizable, future-ready security ecosystem. This approach not only enhances your home's safety but also transforms your embedded systems project into a comprehensive smart home solution optimized for performance, flexibility, and user experience.

Image courtesy of Jakub Zerdzicki